Design process
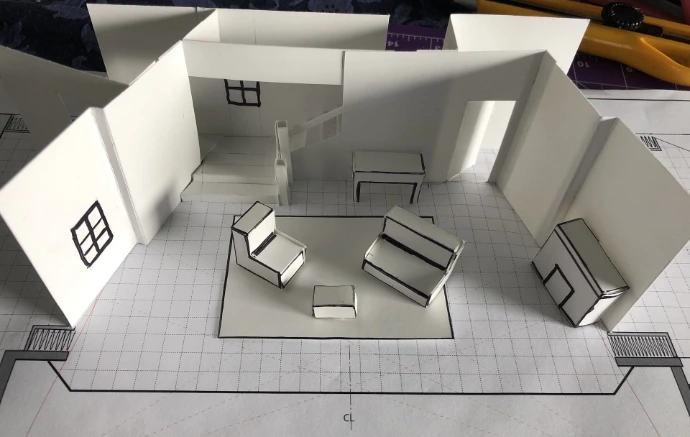
After sketching the set design on paper, I made a simple white model at 1/4 inch scale.
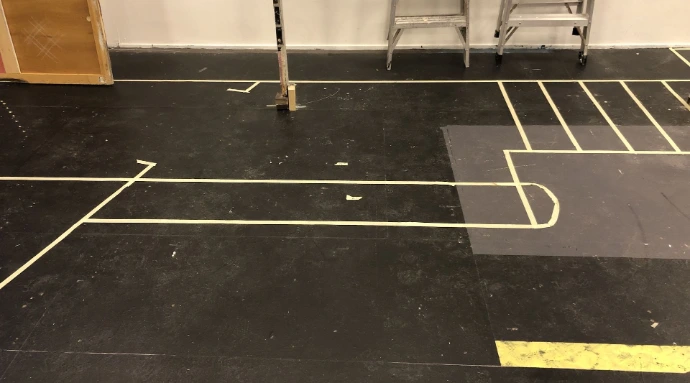
Some small changes to the design were made while taping the stage for the set builders. I also provided elevation drawings.
More detail about the design and build process for this set.
After sketching the set design on paper, I made a simple white model at 1/4 inch scale.
Some small changes to the design were made while taping the stage for the set builders. I also provided elevation drawings.
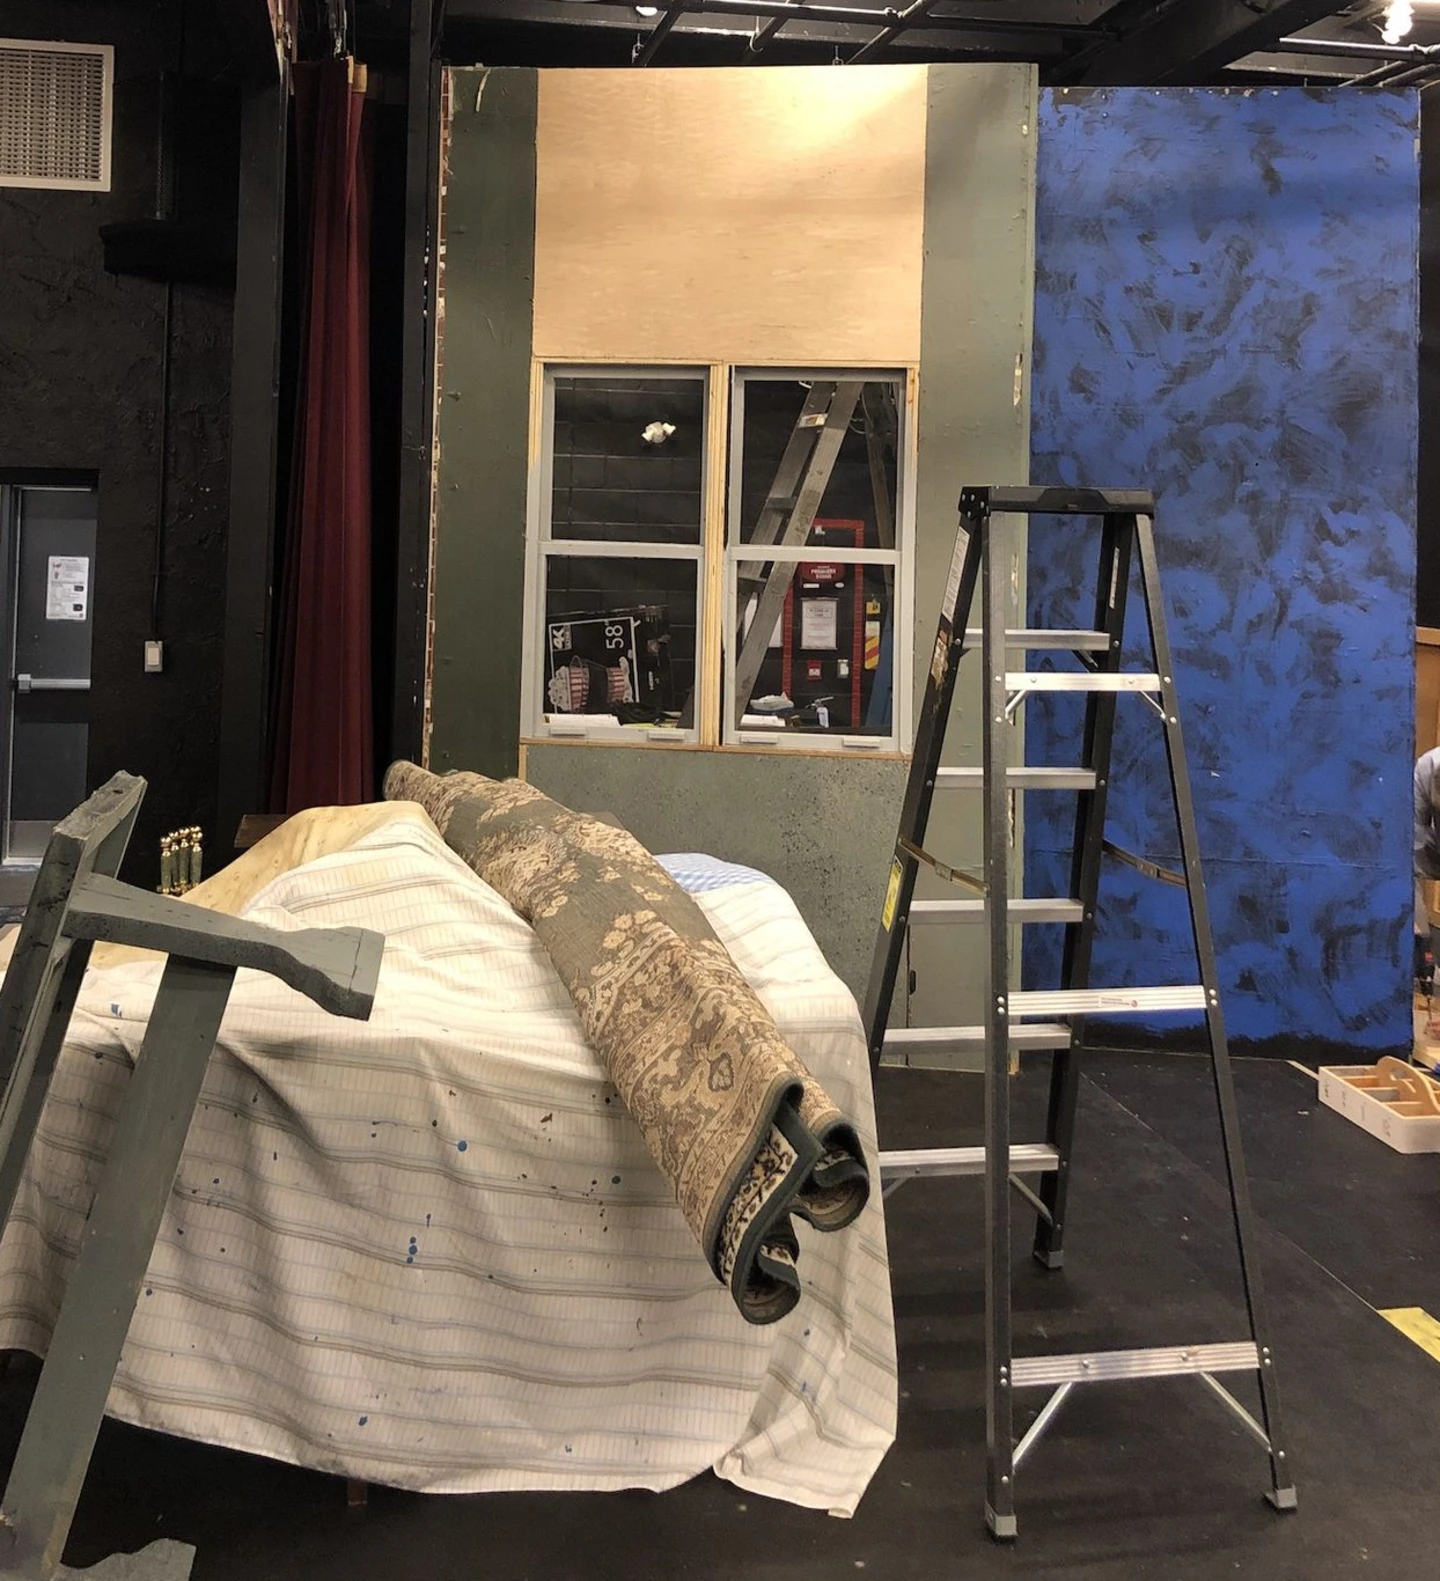
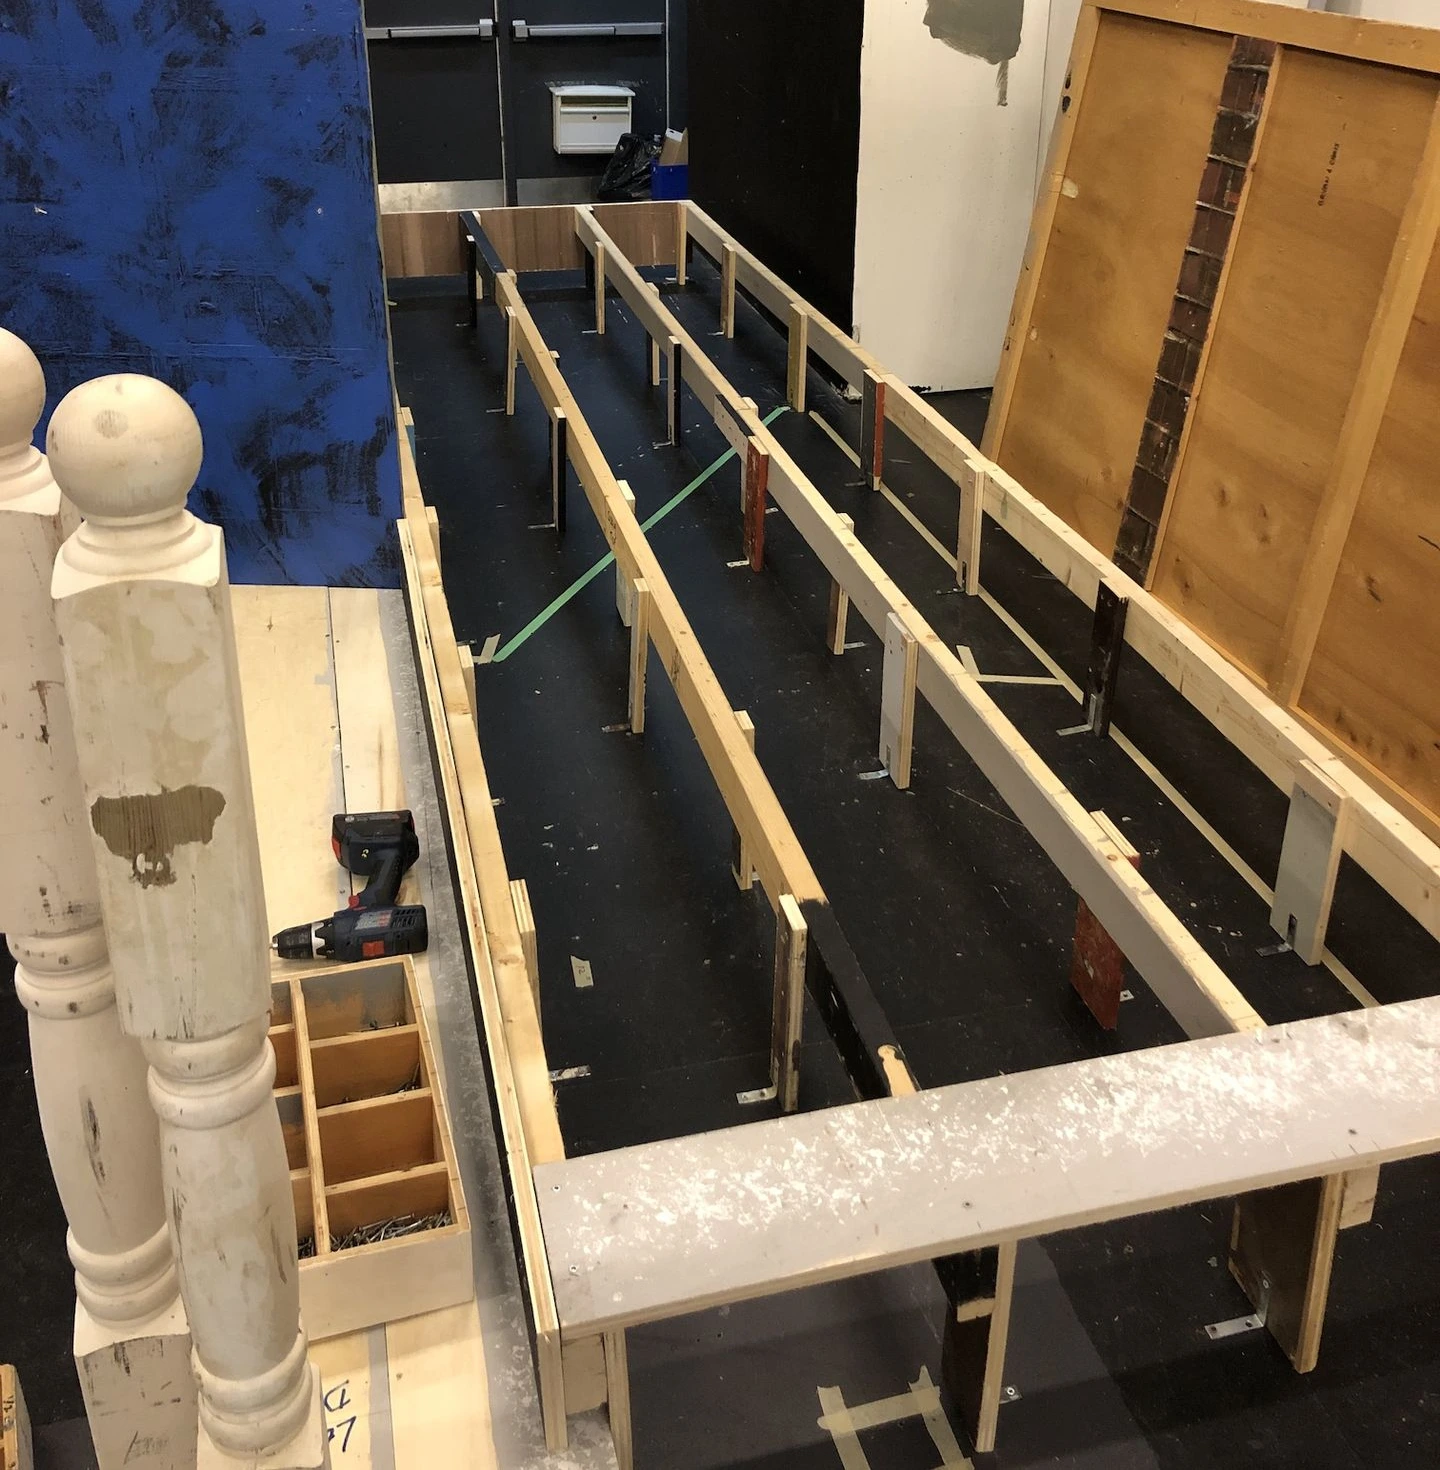
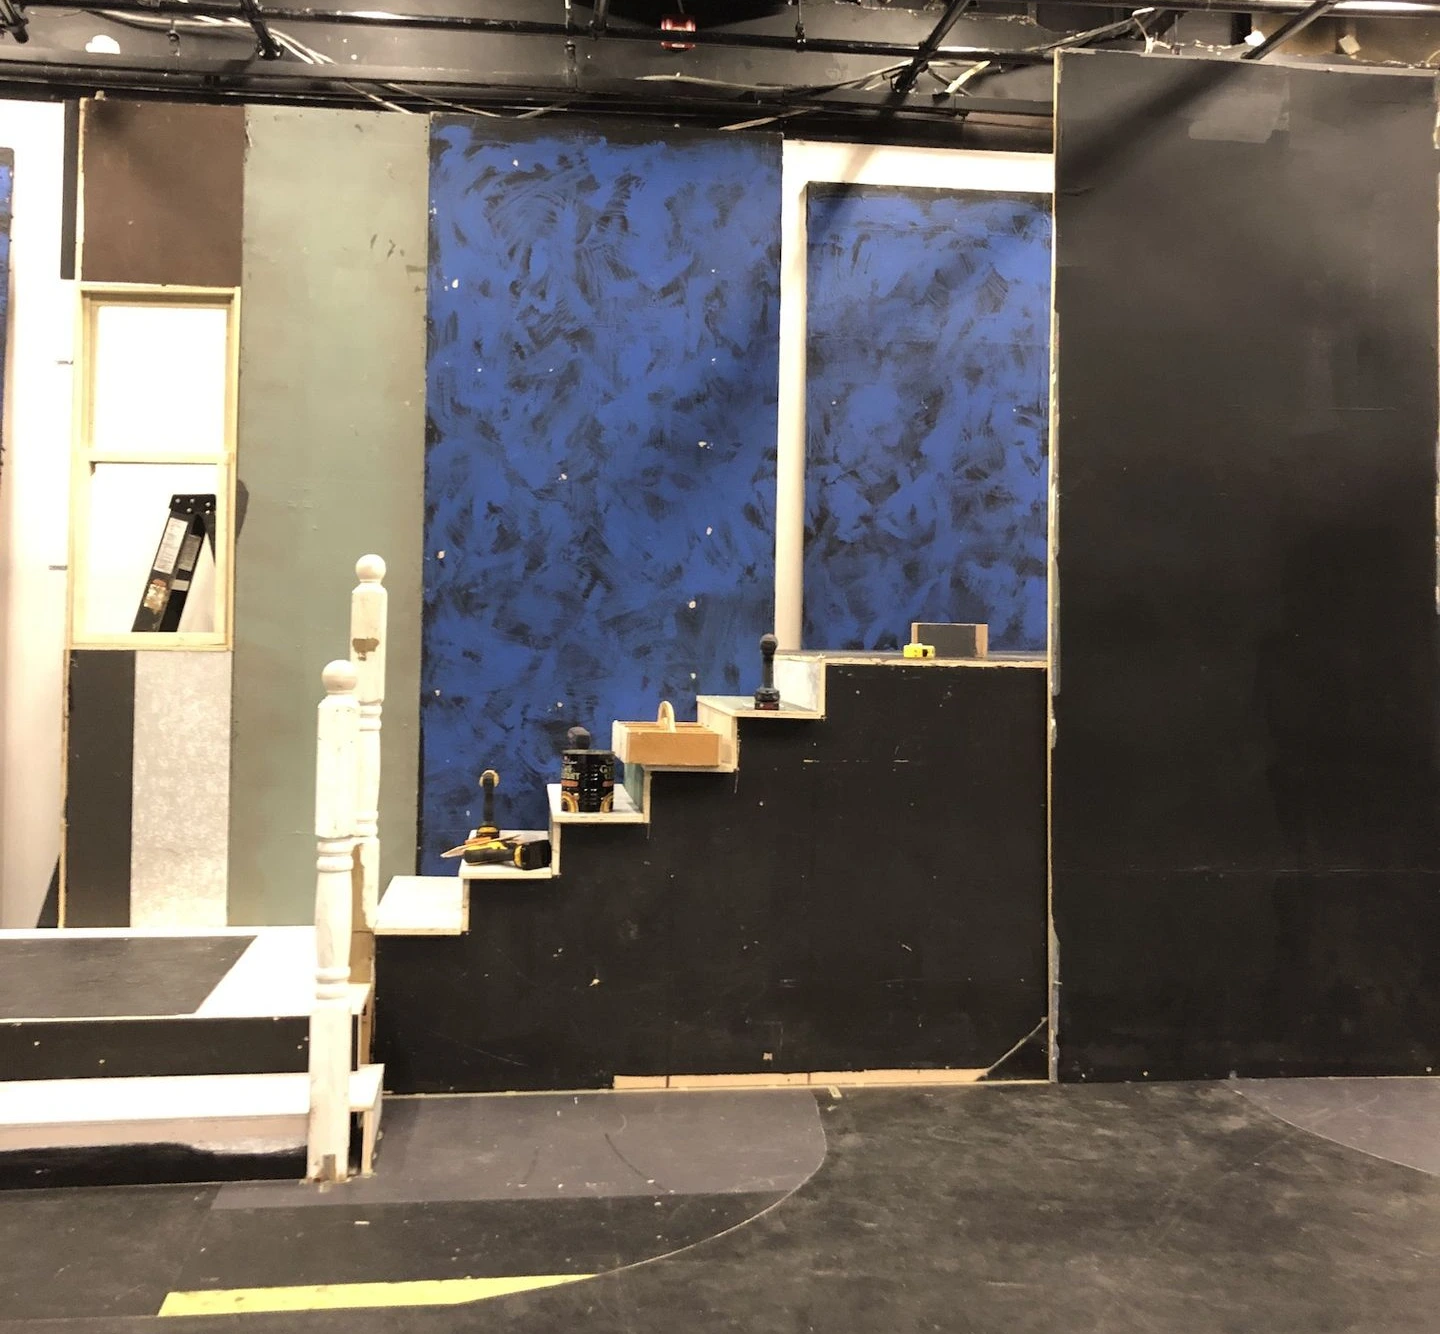
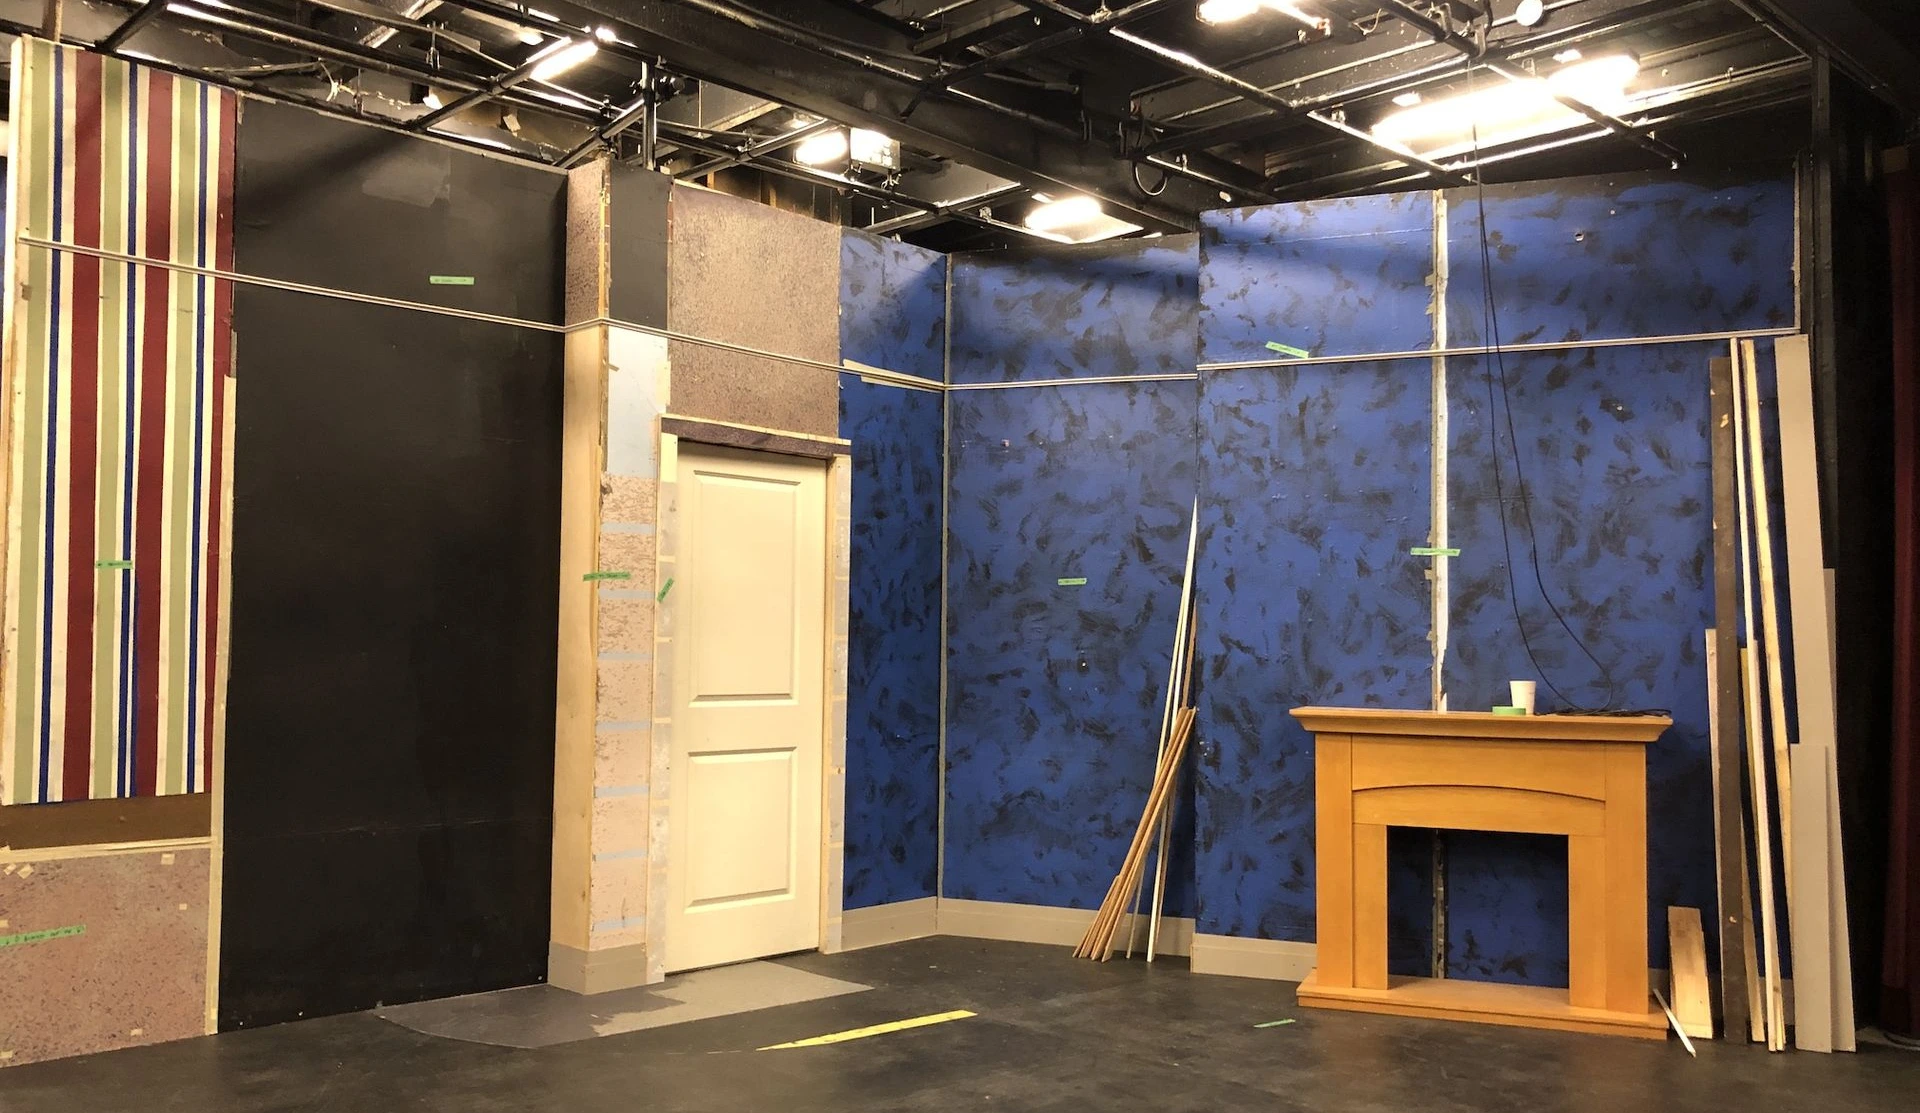
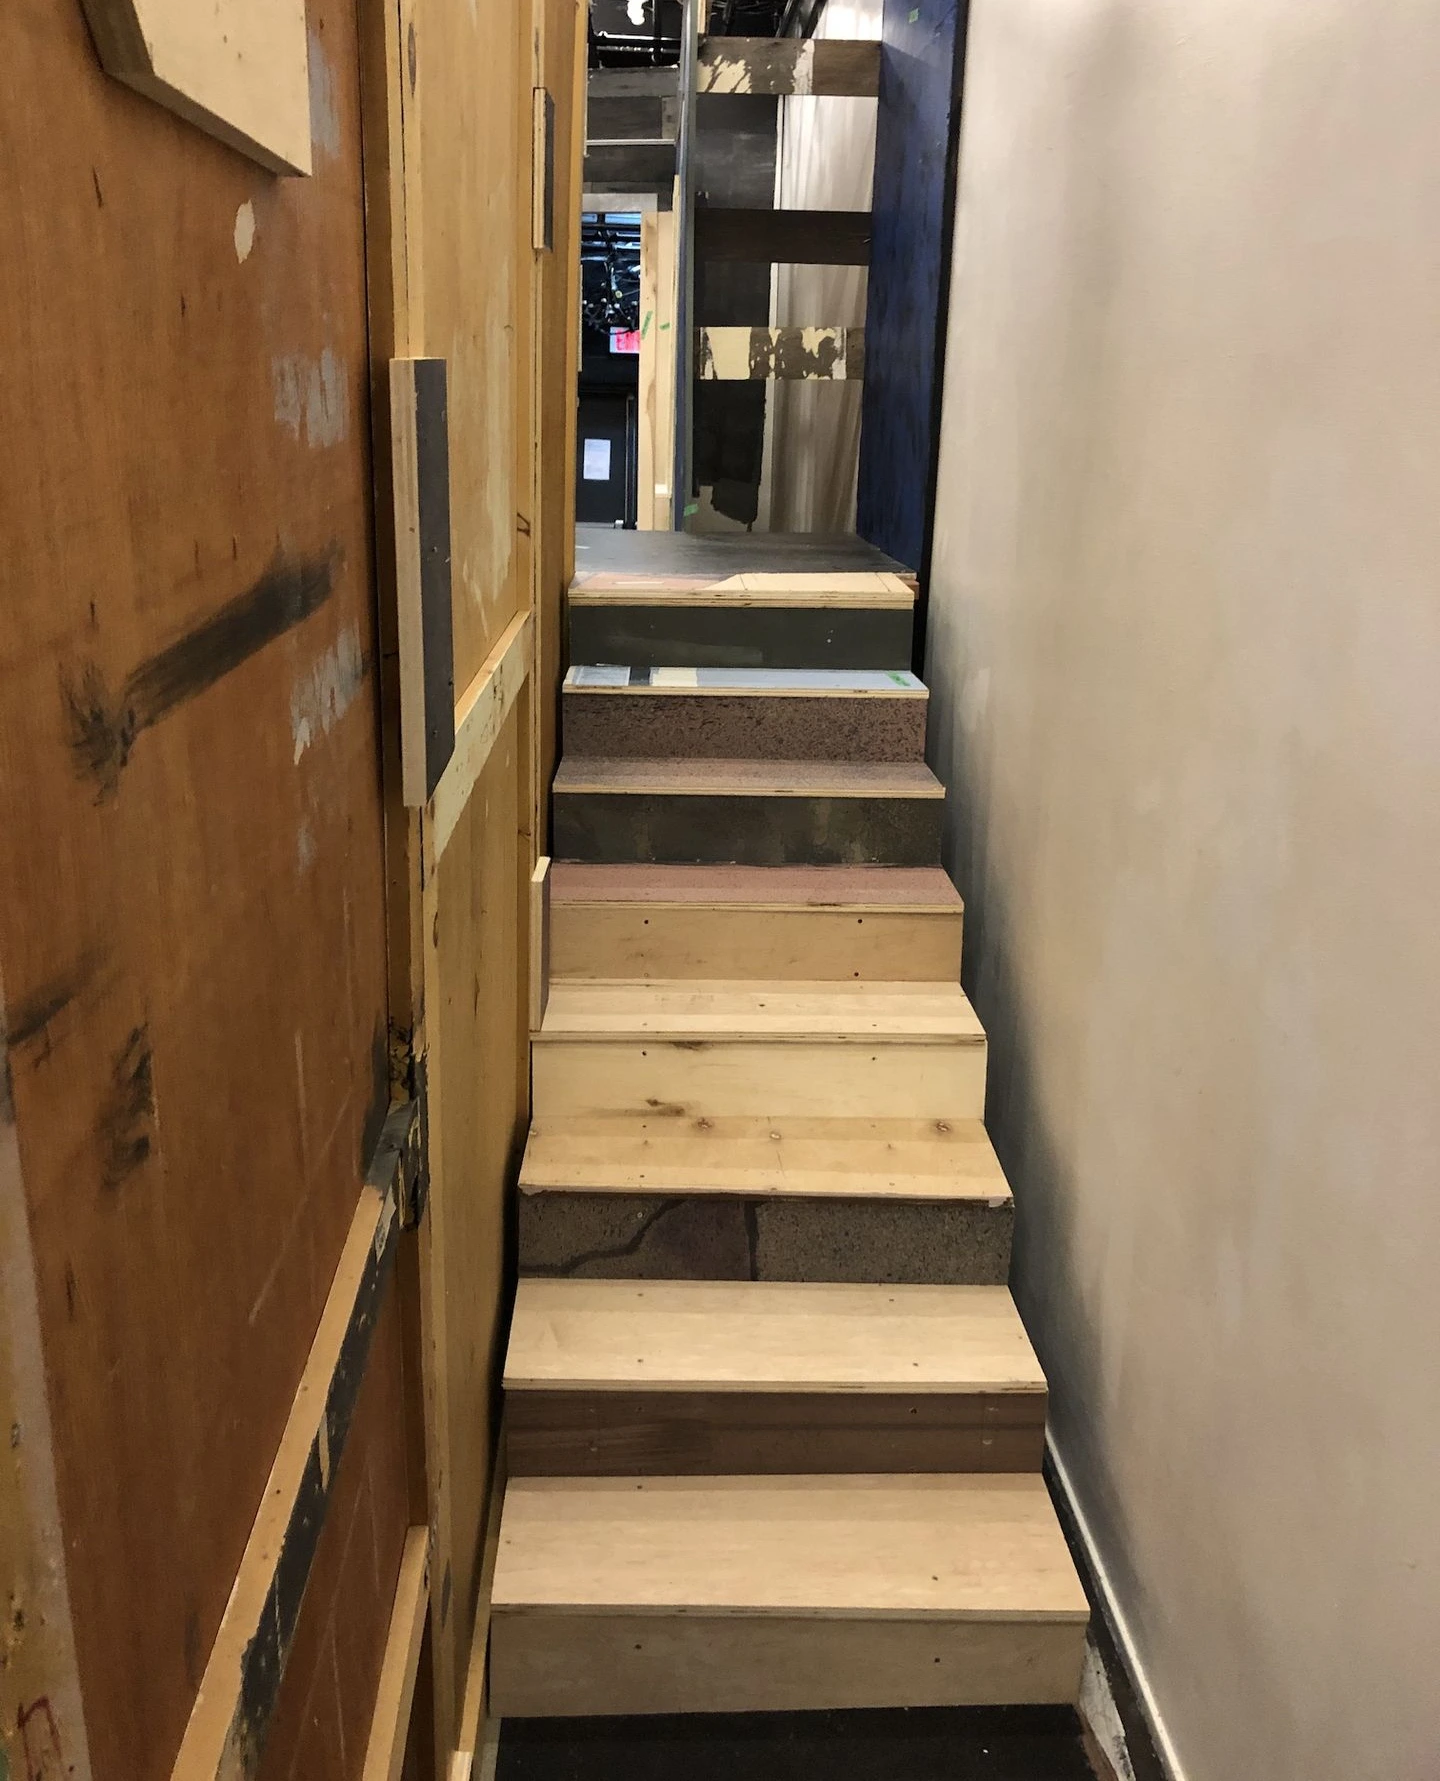
This sequence of photographs shows the set build process. I was on hand to answer questions from the builders (as well as actually do some of the work!)
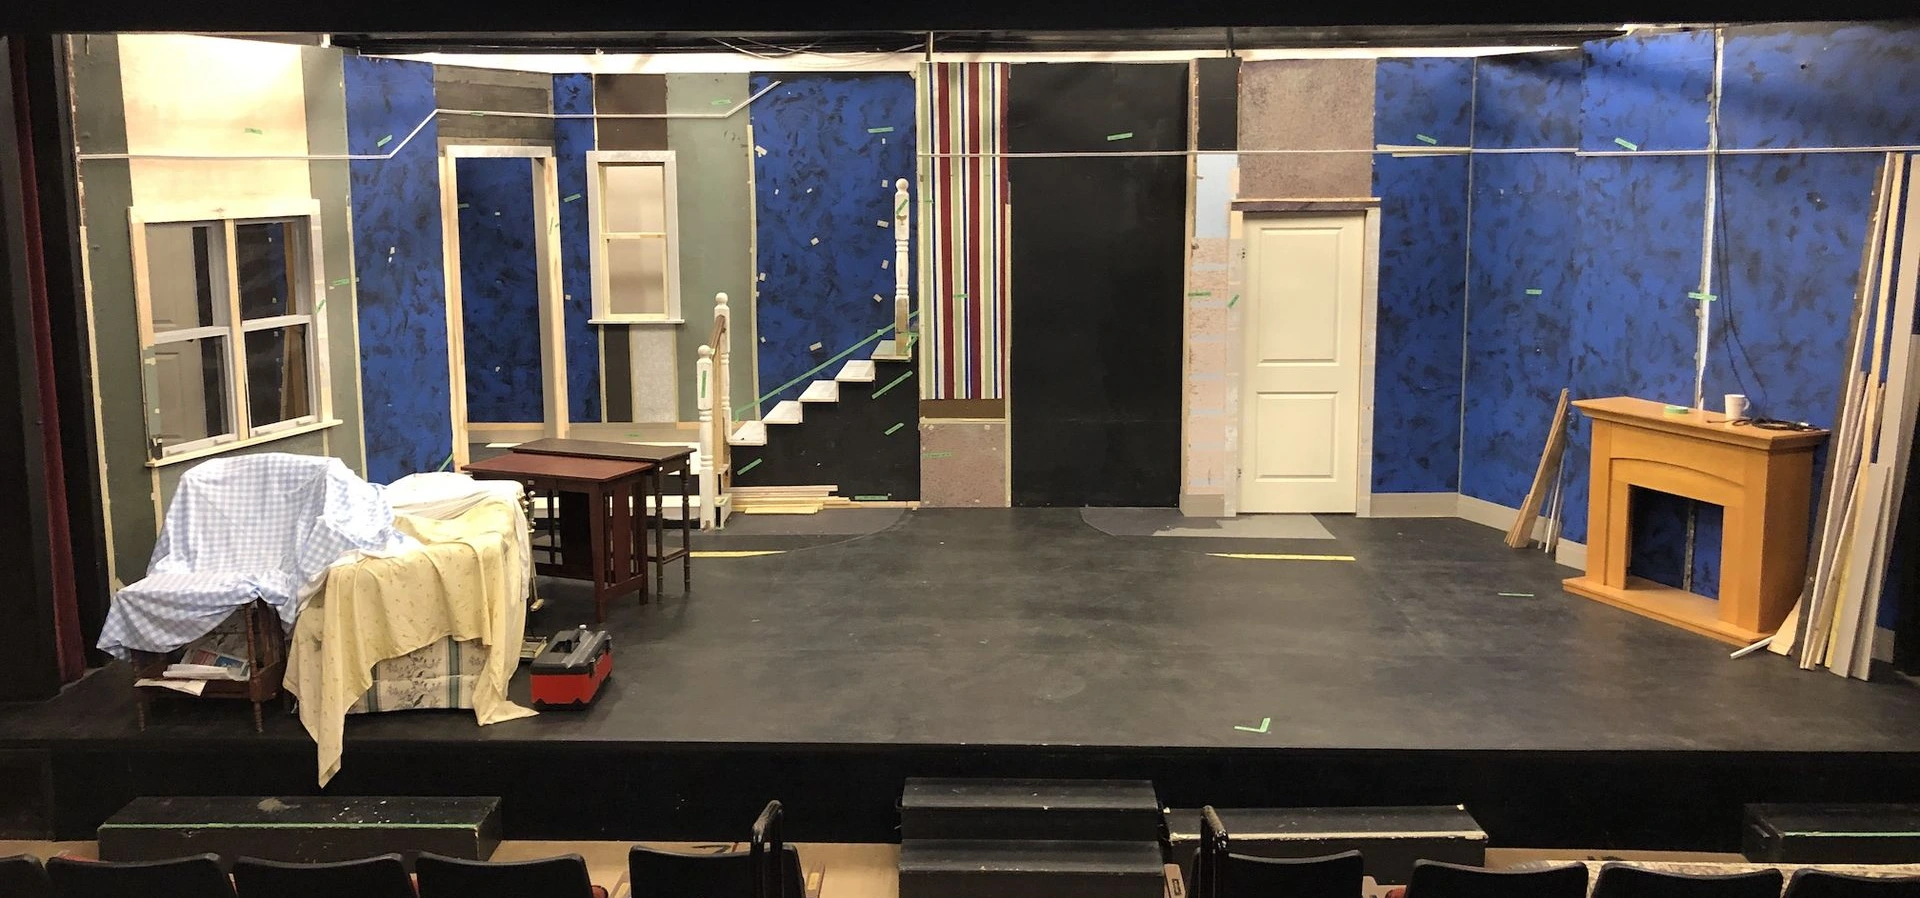
Riser build
Back wall

The grid is not high enough for an “upstairs” level, so there was a landing after 8 stairs, followed by a set of escape stairs.
Trim and baseboard being added.

Escape stairs
Build almost complete. Only the bannister and stairs trim remaining.
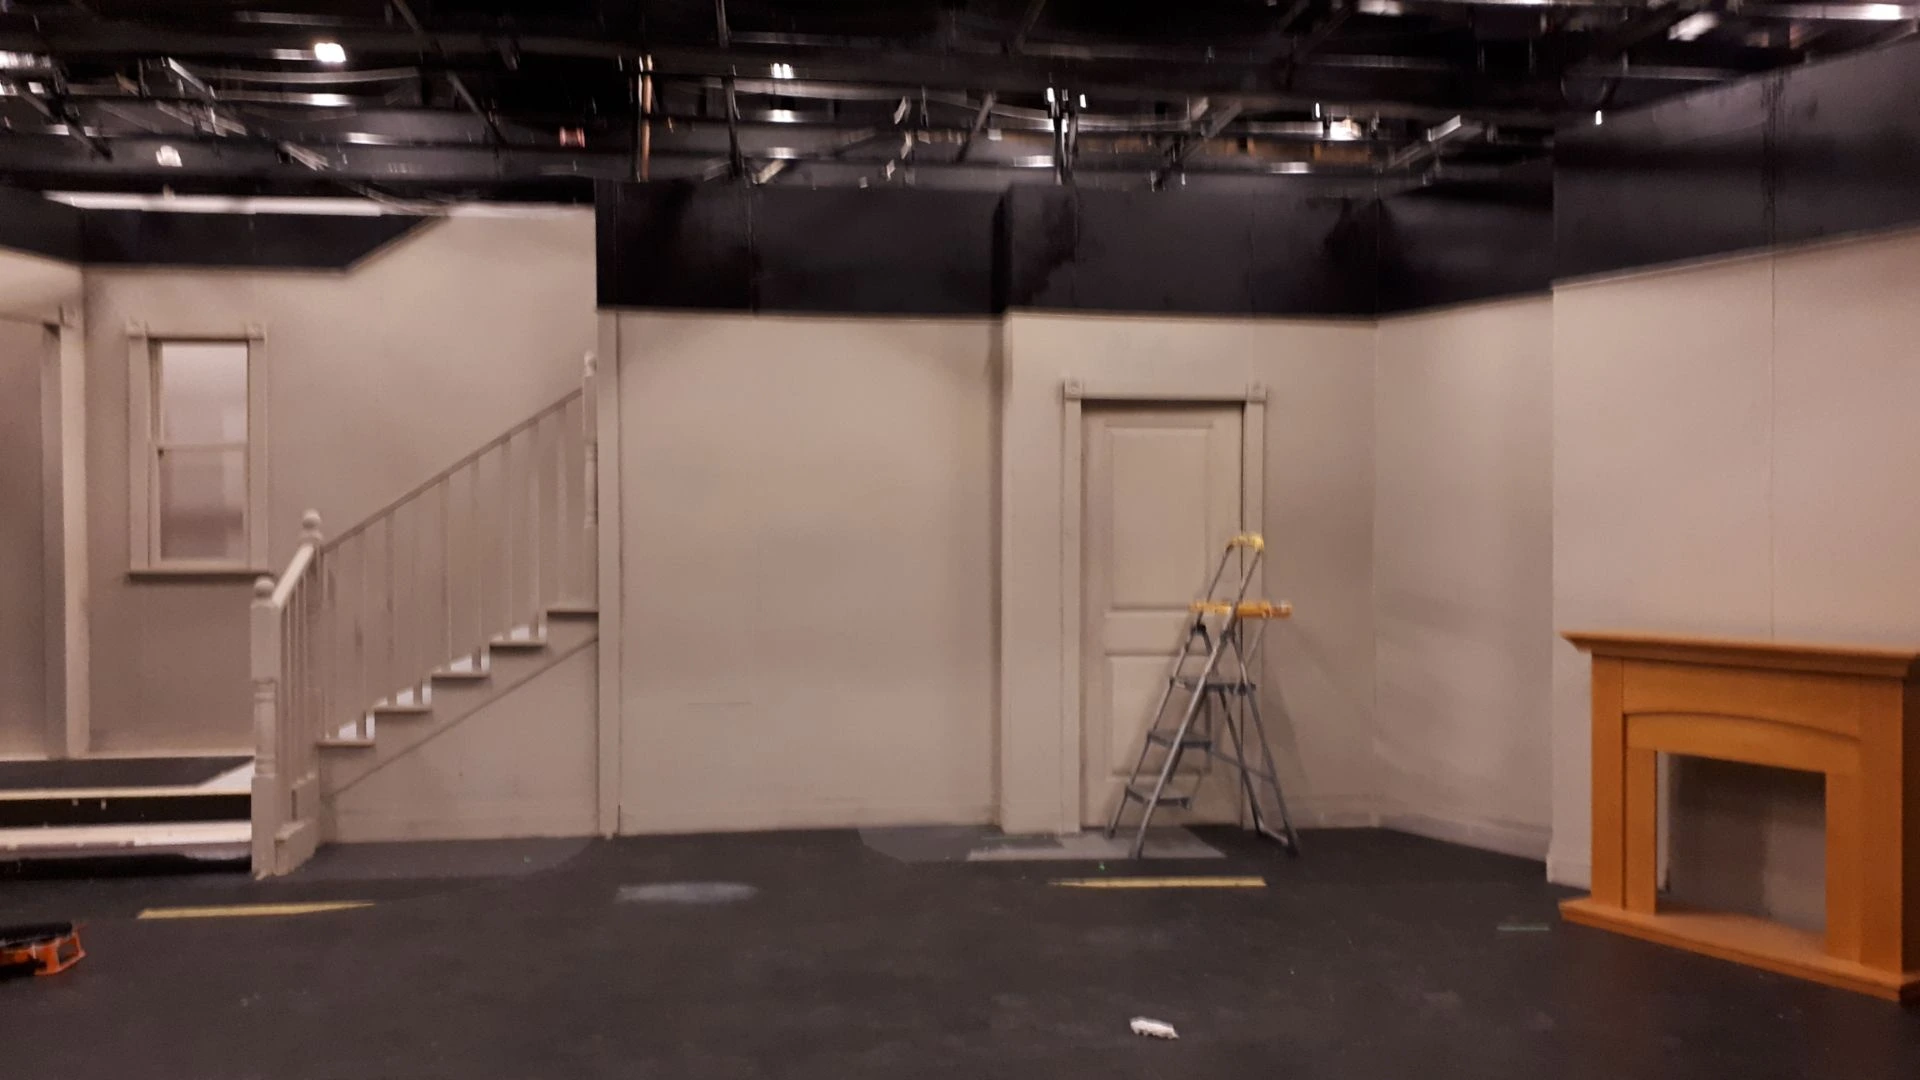
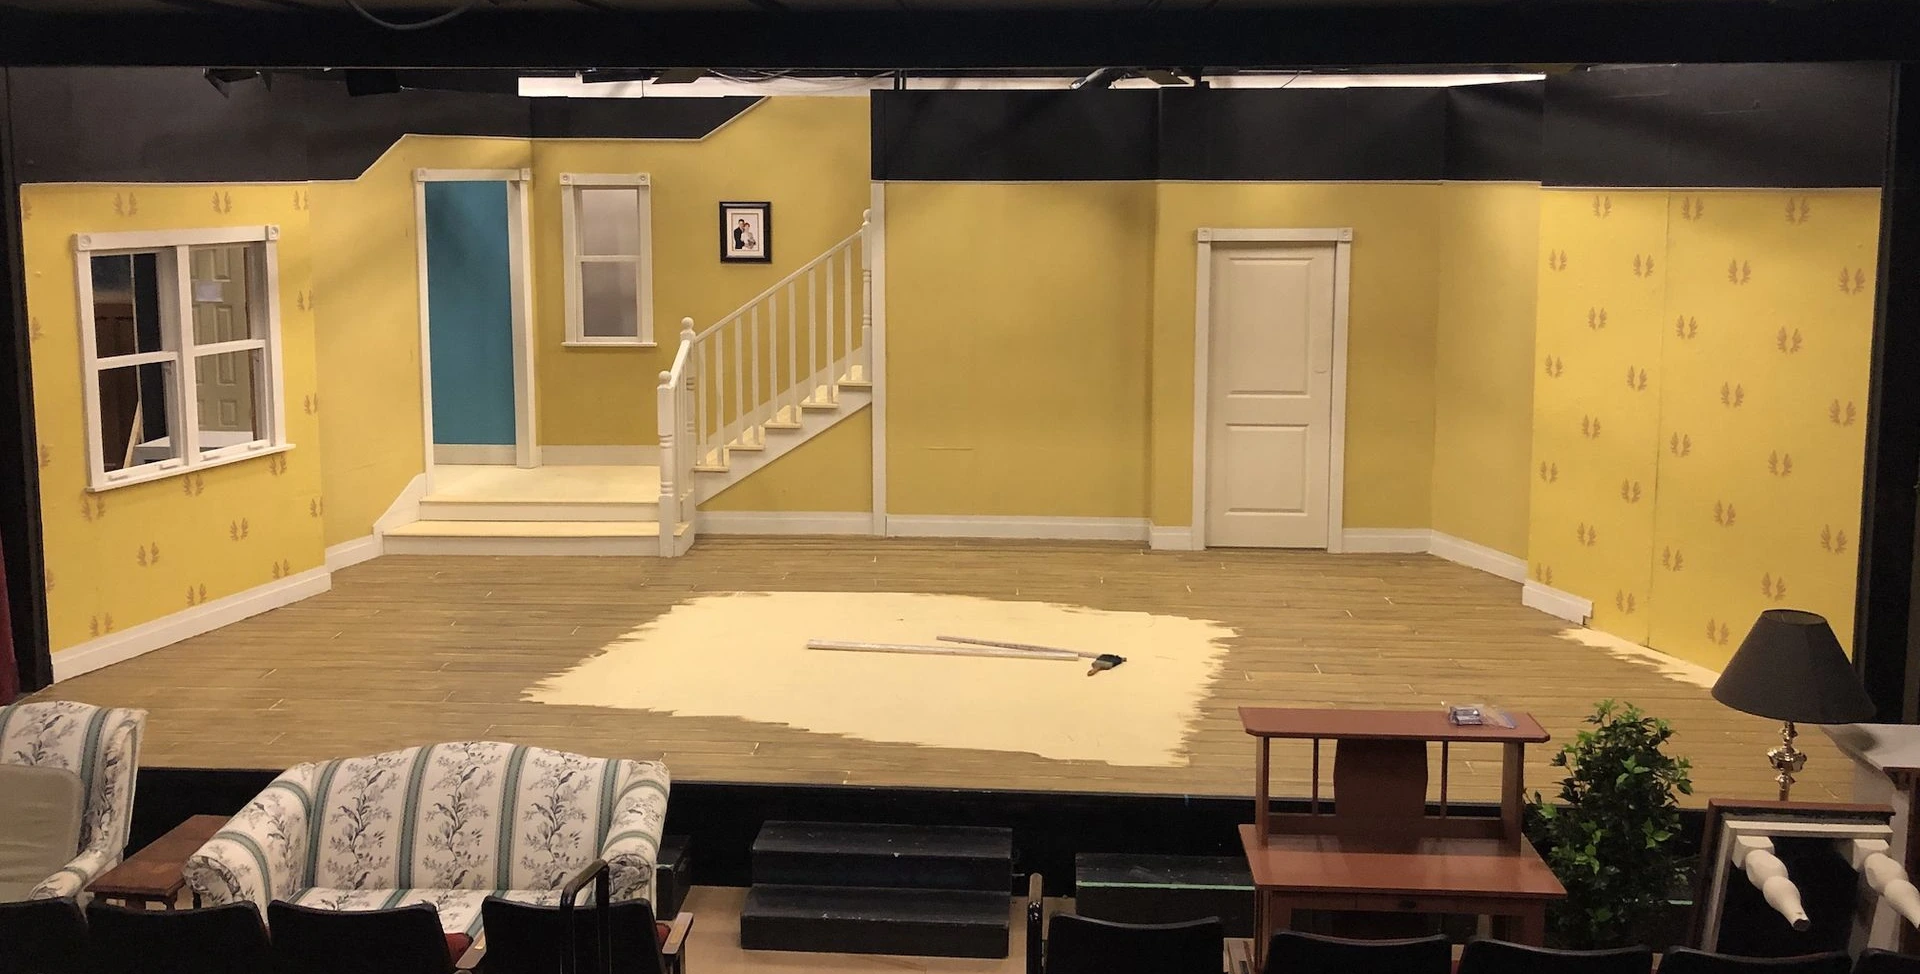
Painting began with a base coat over the entire set (except the floor which would be given a wood grain treatment later).
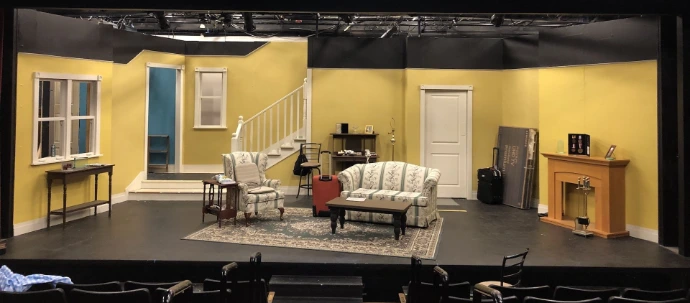
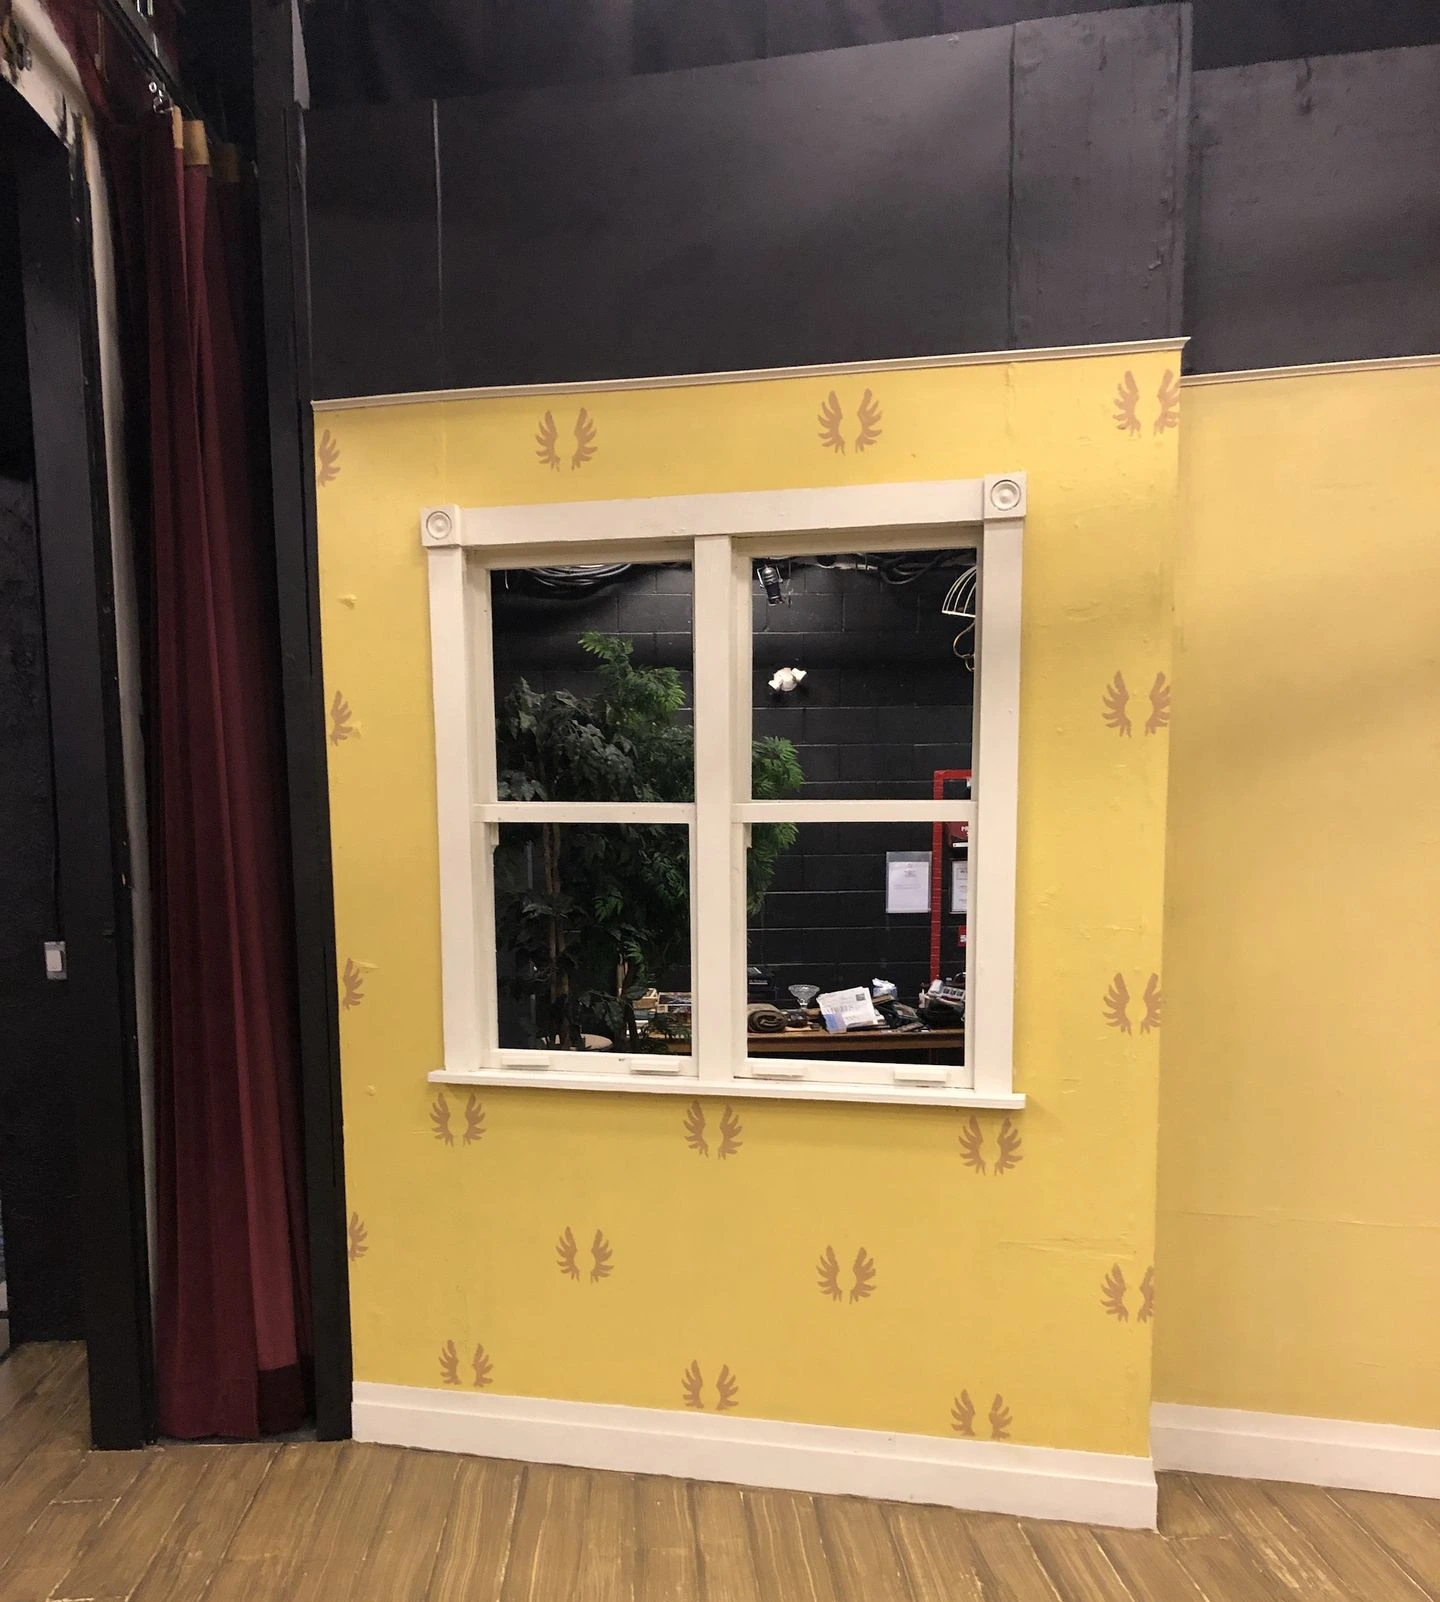
The walls were painted with two tones of yellow and the foyer and kitchen corridor (behind the swing door upstage left) were a blue-teal colour.
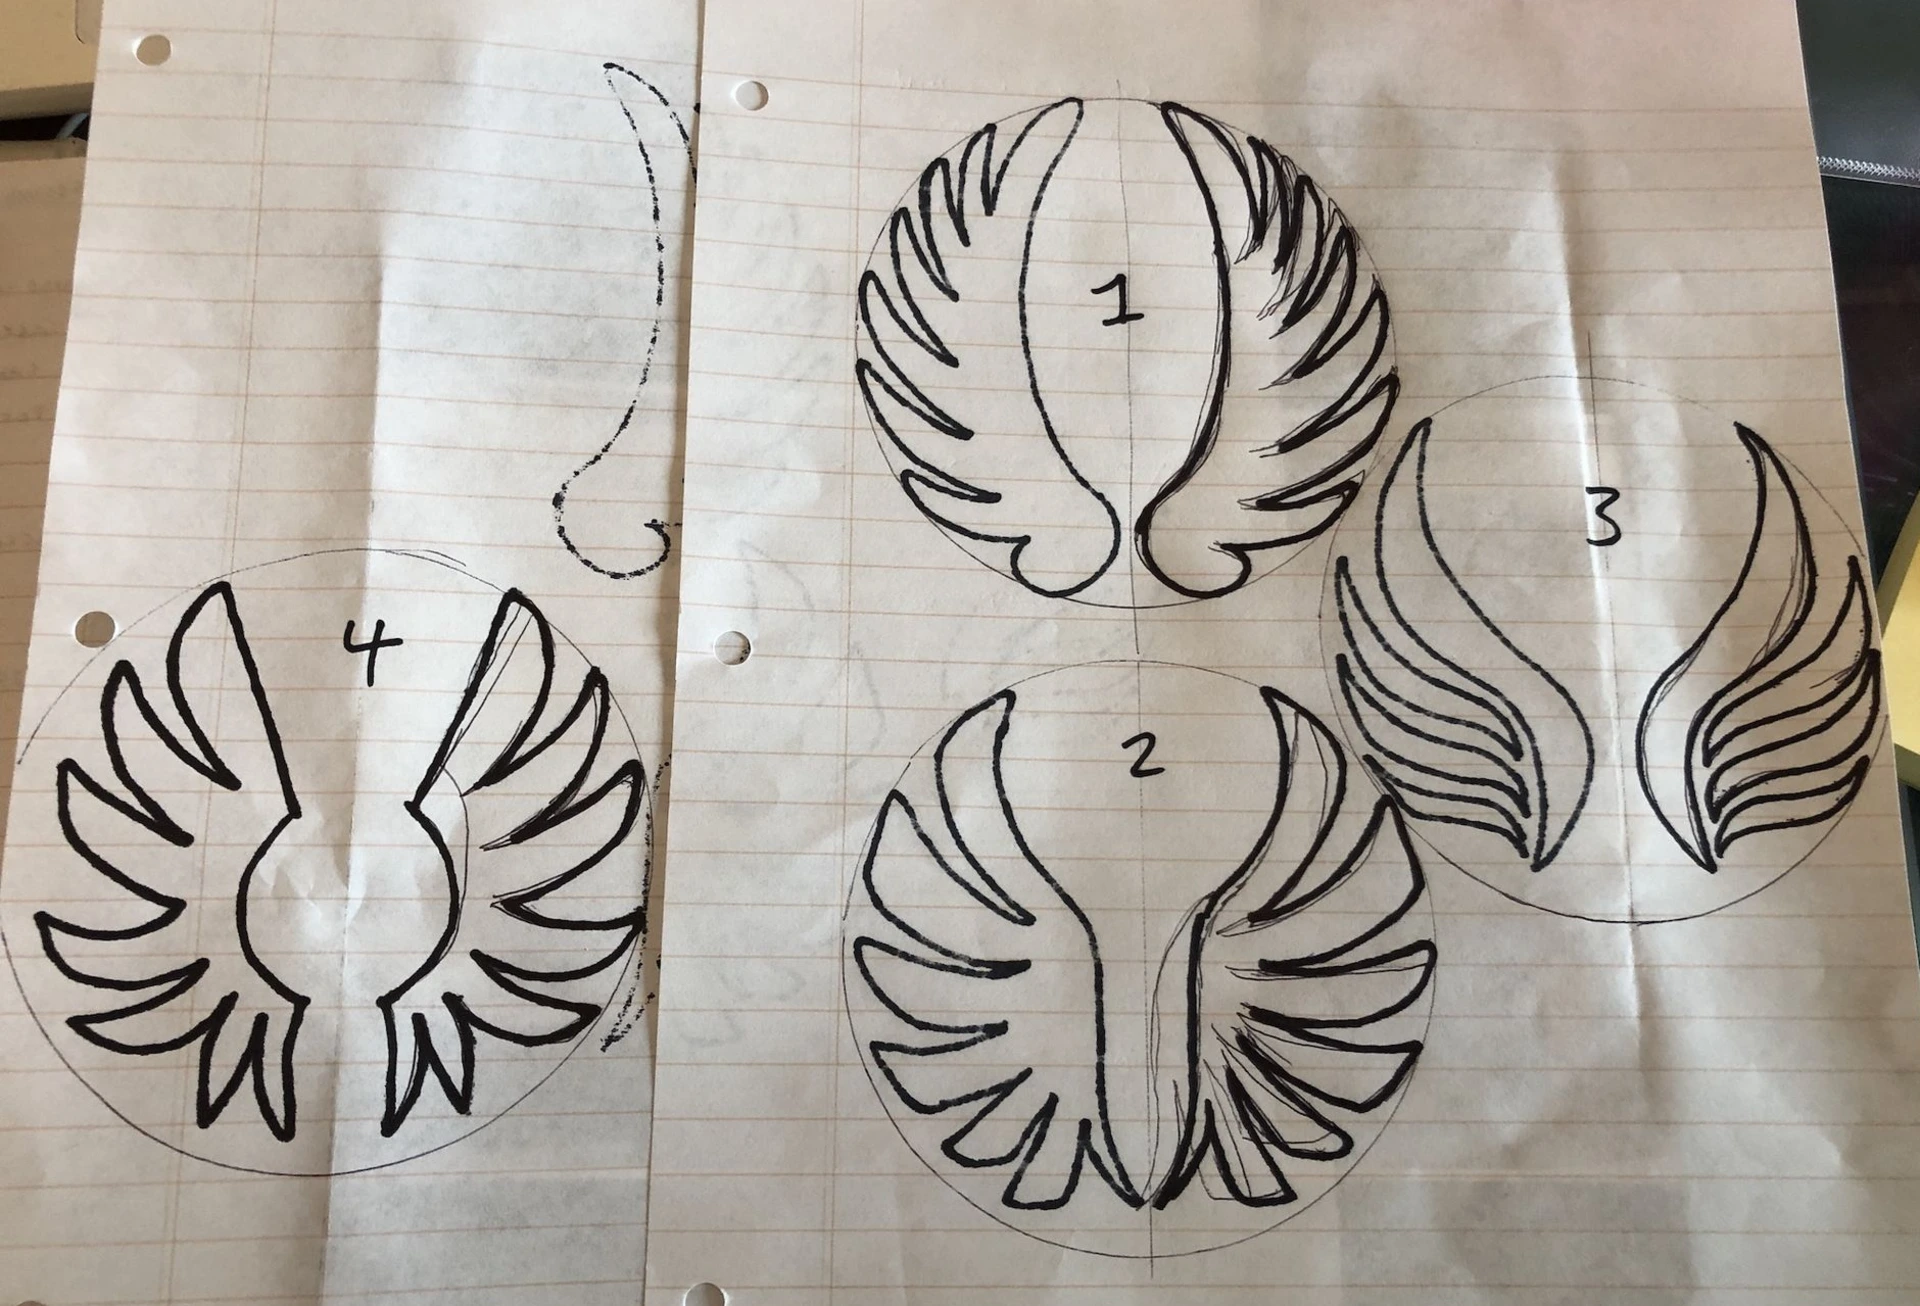
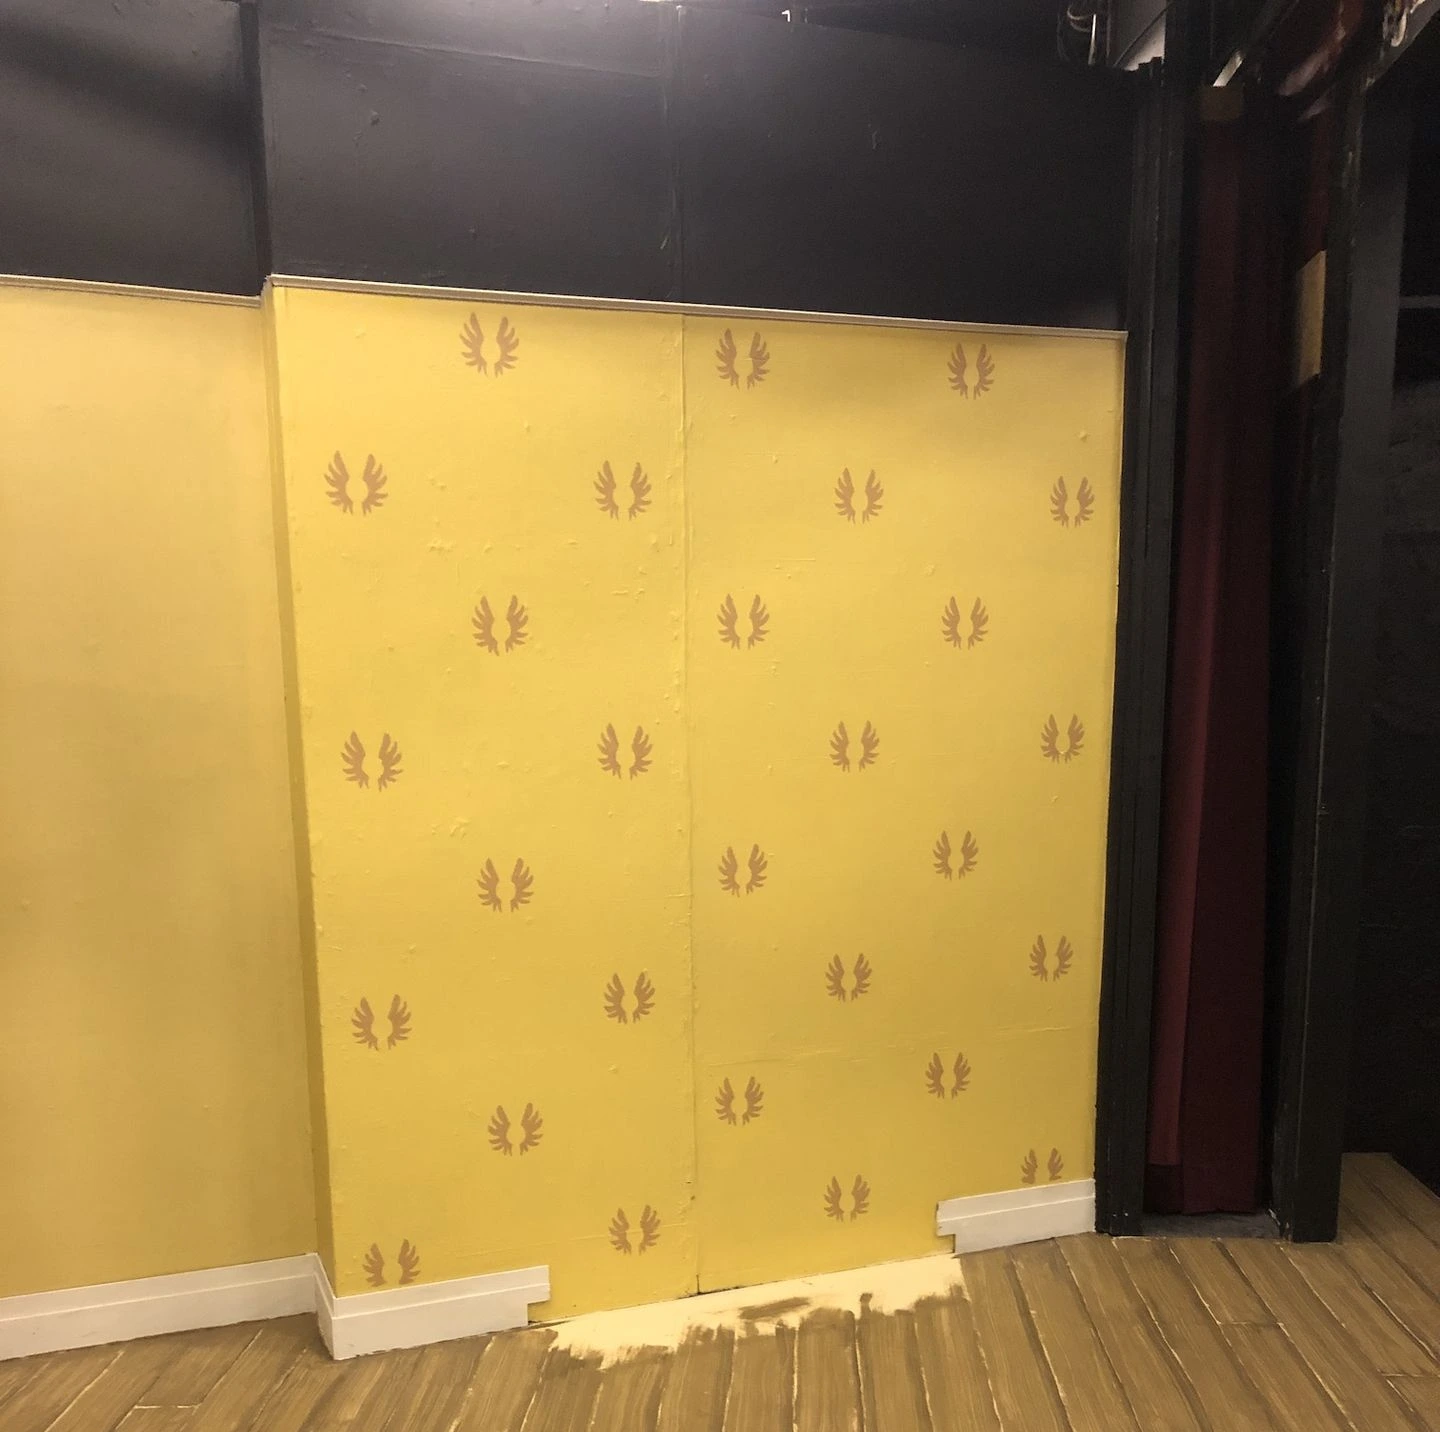
A stencil motif was added to the walls downstage left and right, based on the wings from the Canadian Special Operations Regiment crest (two of the characters in the play are former members of CSOR).
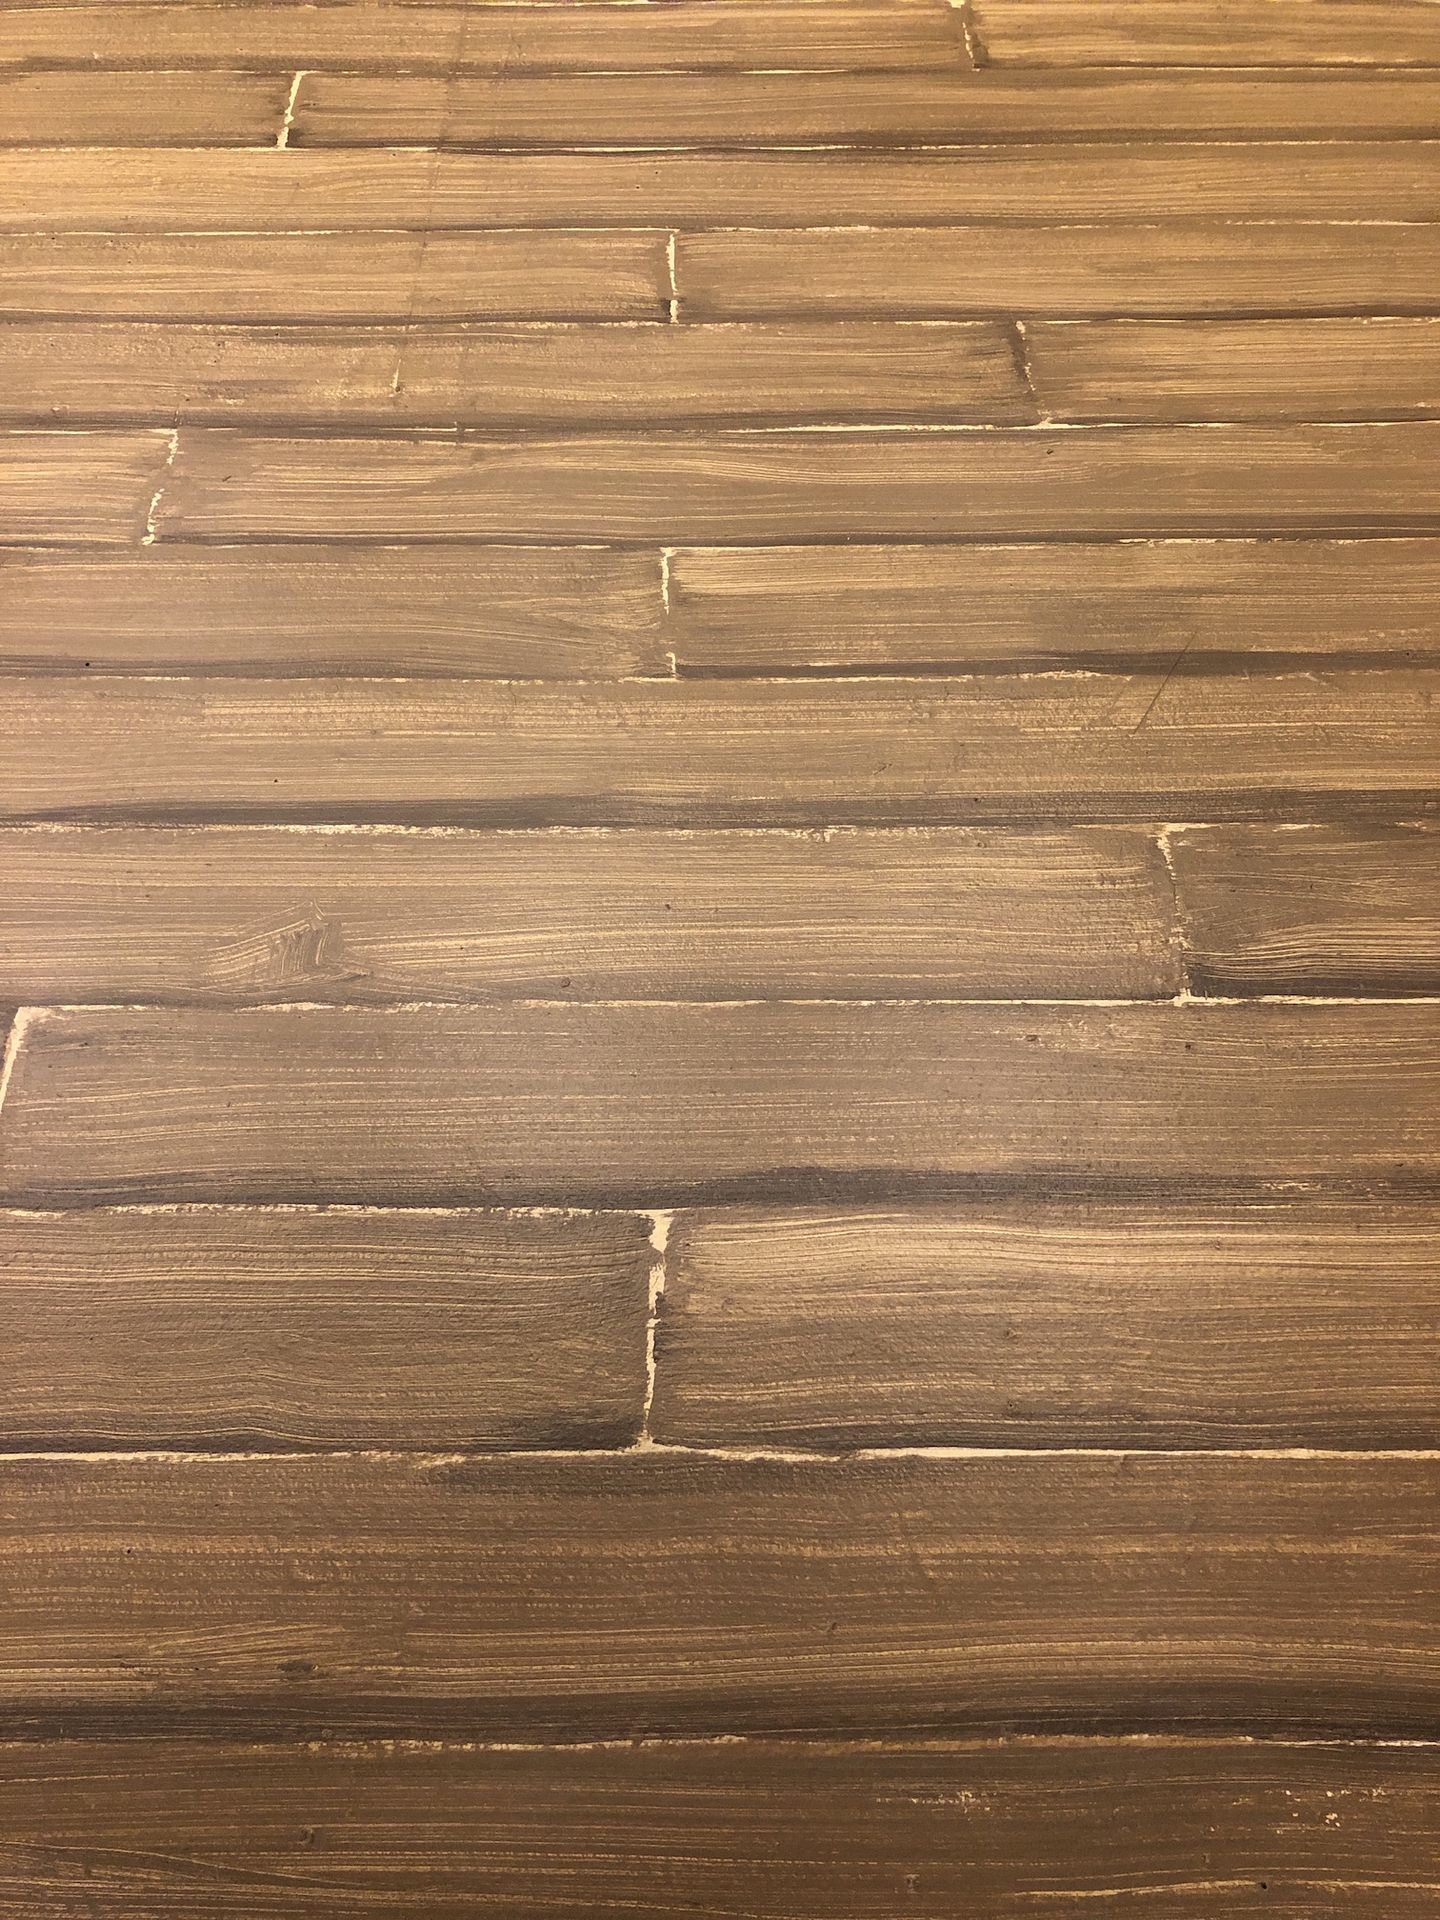
The floor was the most time-consuming part of the painting as it called for a wood grain effect across the entire stage floor. This process took around 3 days in total. The first step was a base coat of a light yellow.

Next, we used two different brown tones that were applied in 6-inch strips, and then brushed with a small besom broom to add the wood grain texture.
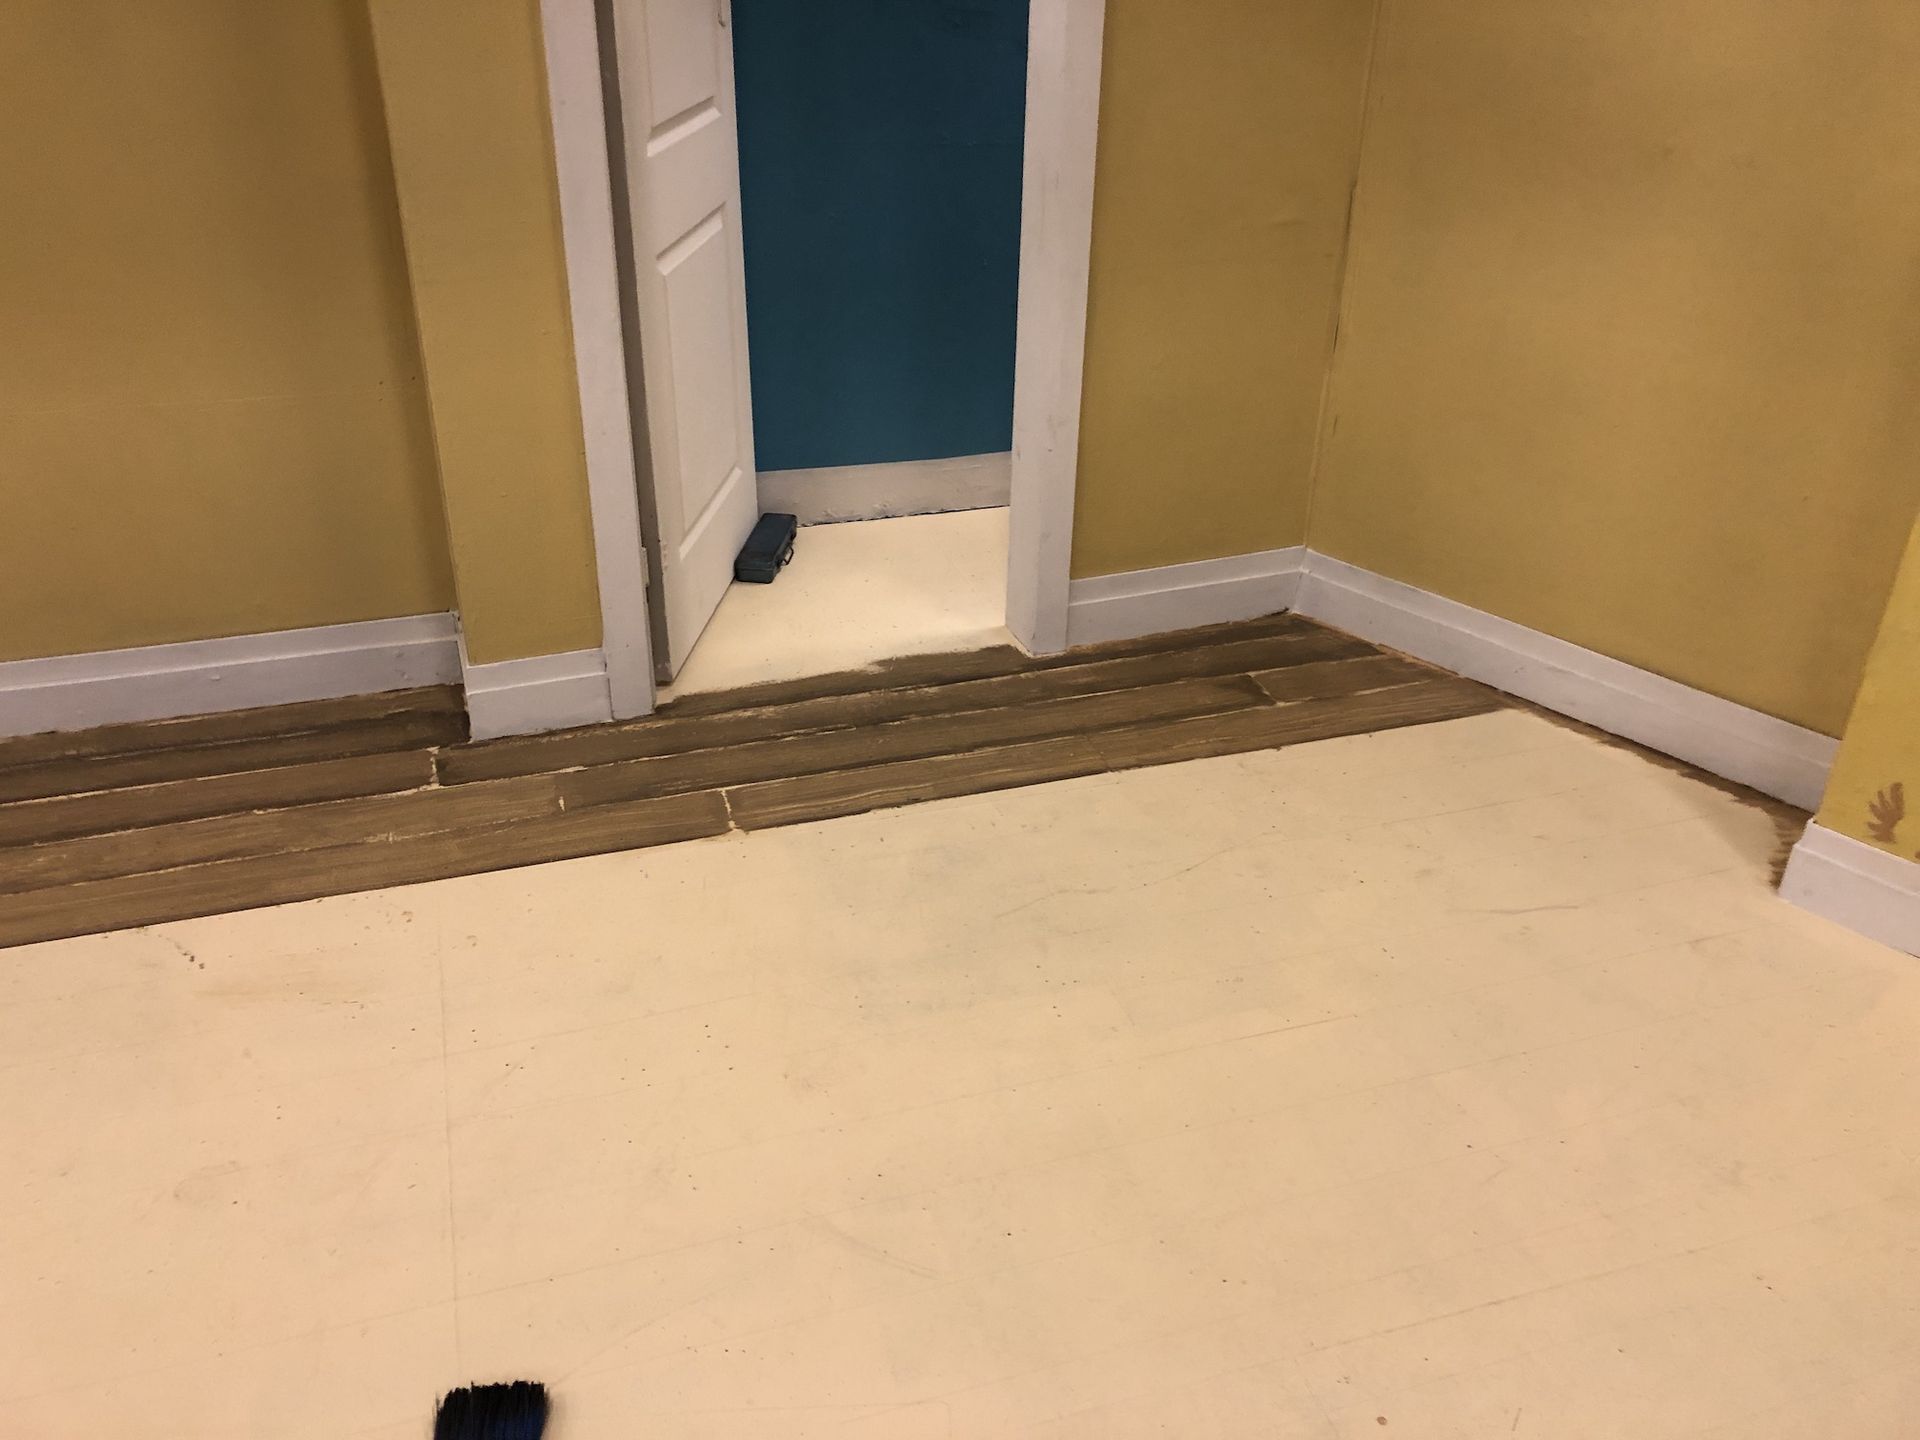
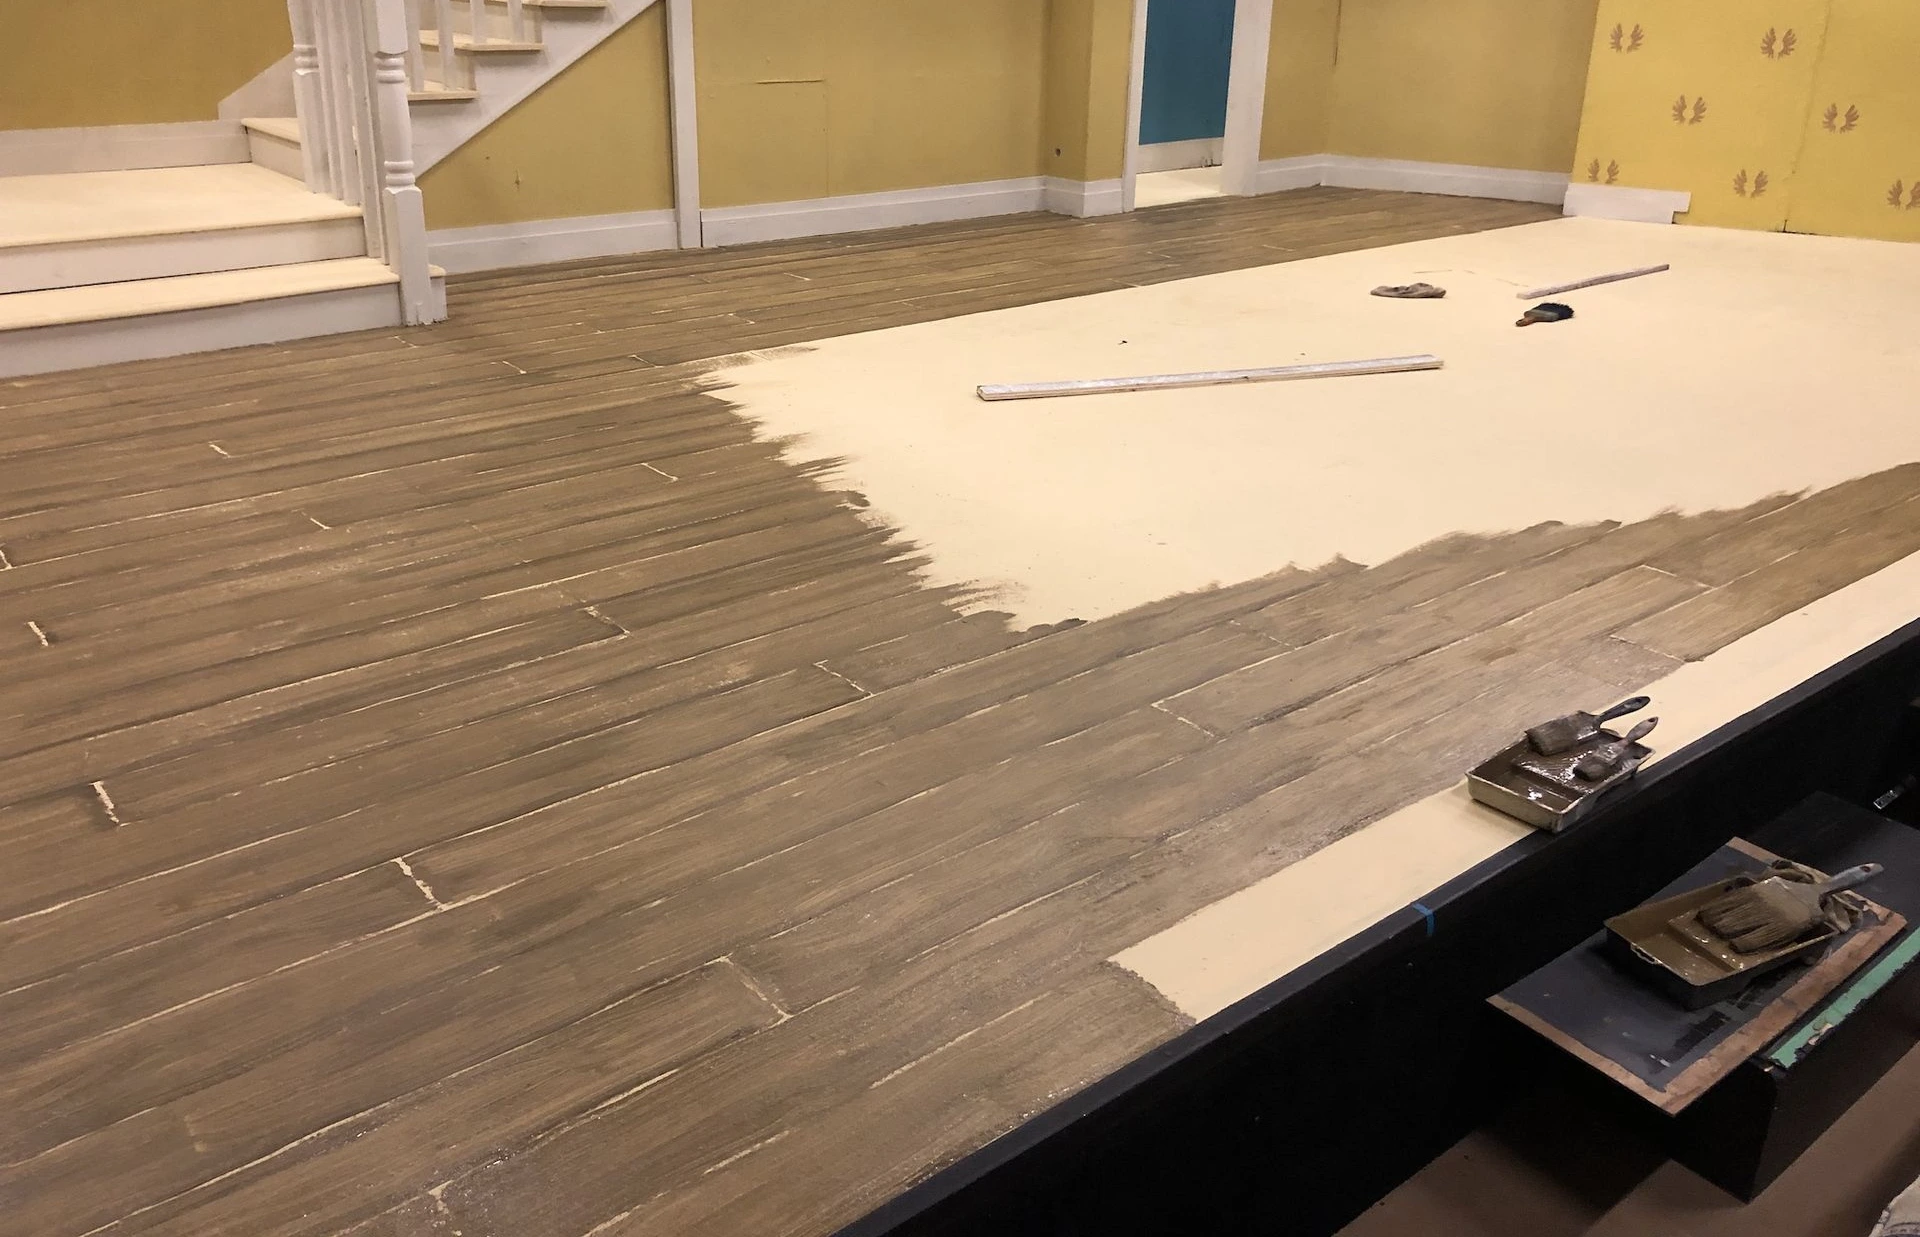
The main stage area is complete. The large unpainted rectangle would be covered with a rug, so wasn’t painted to save time and materials.
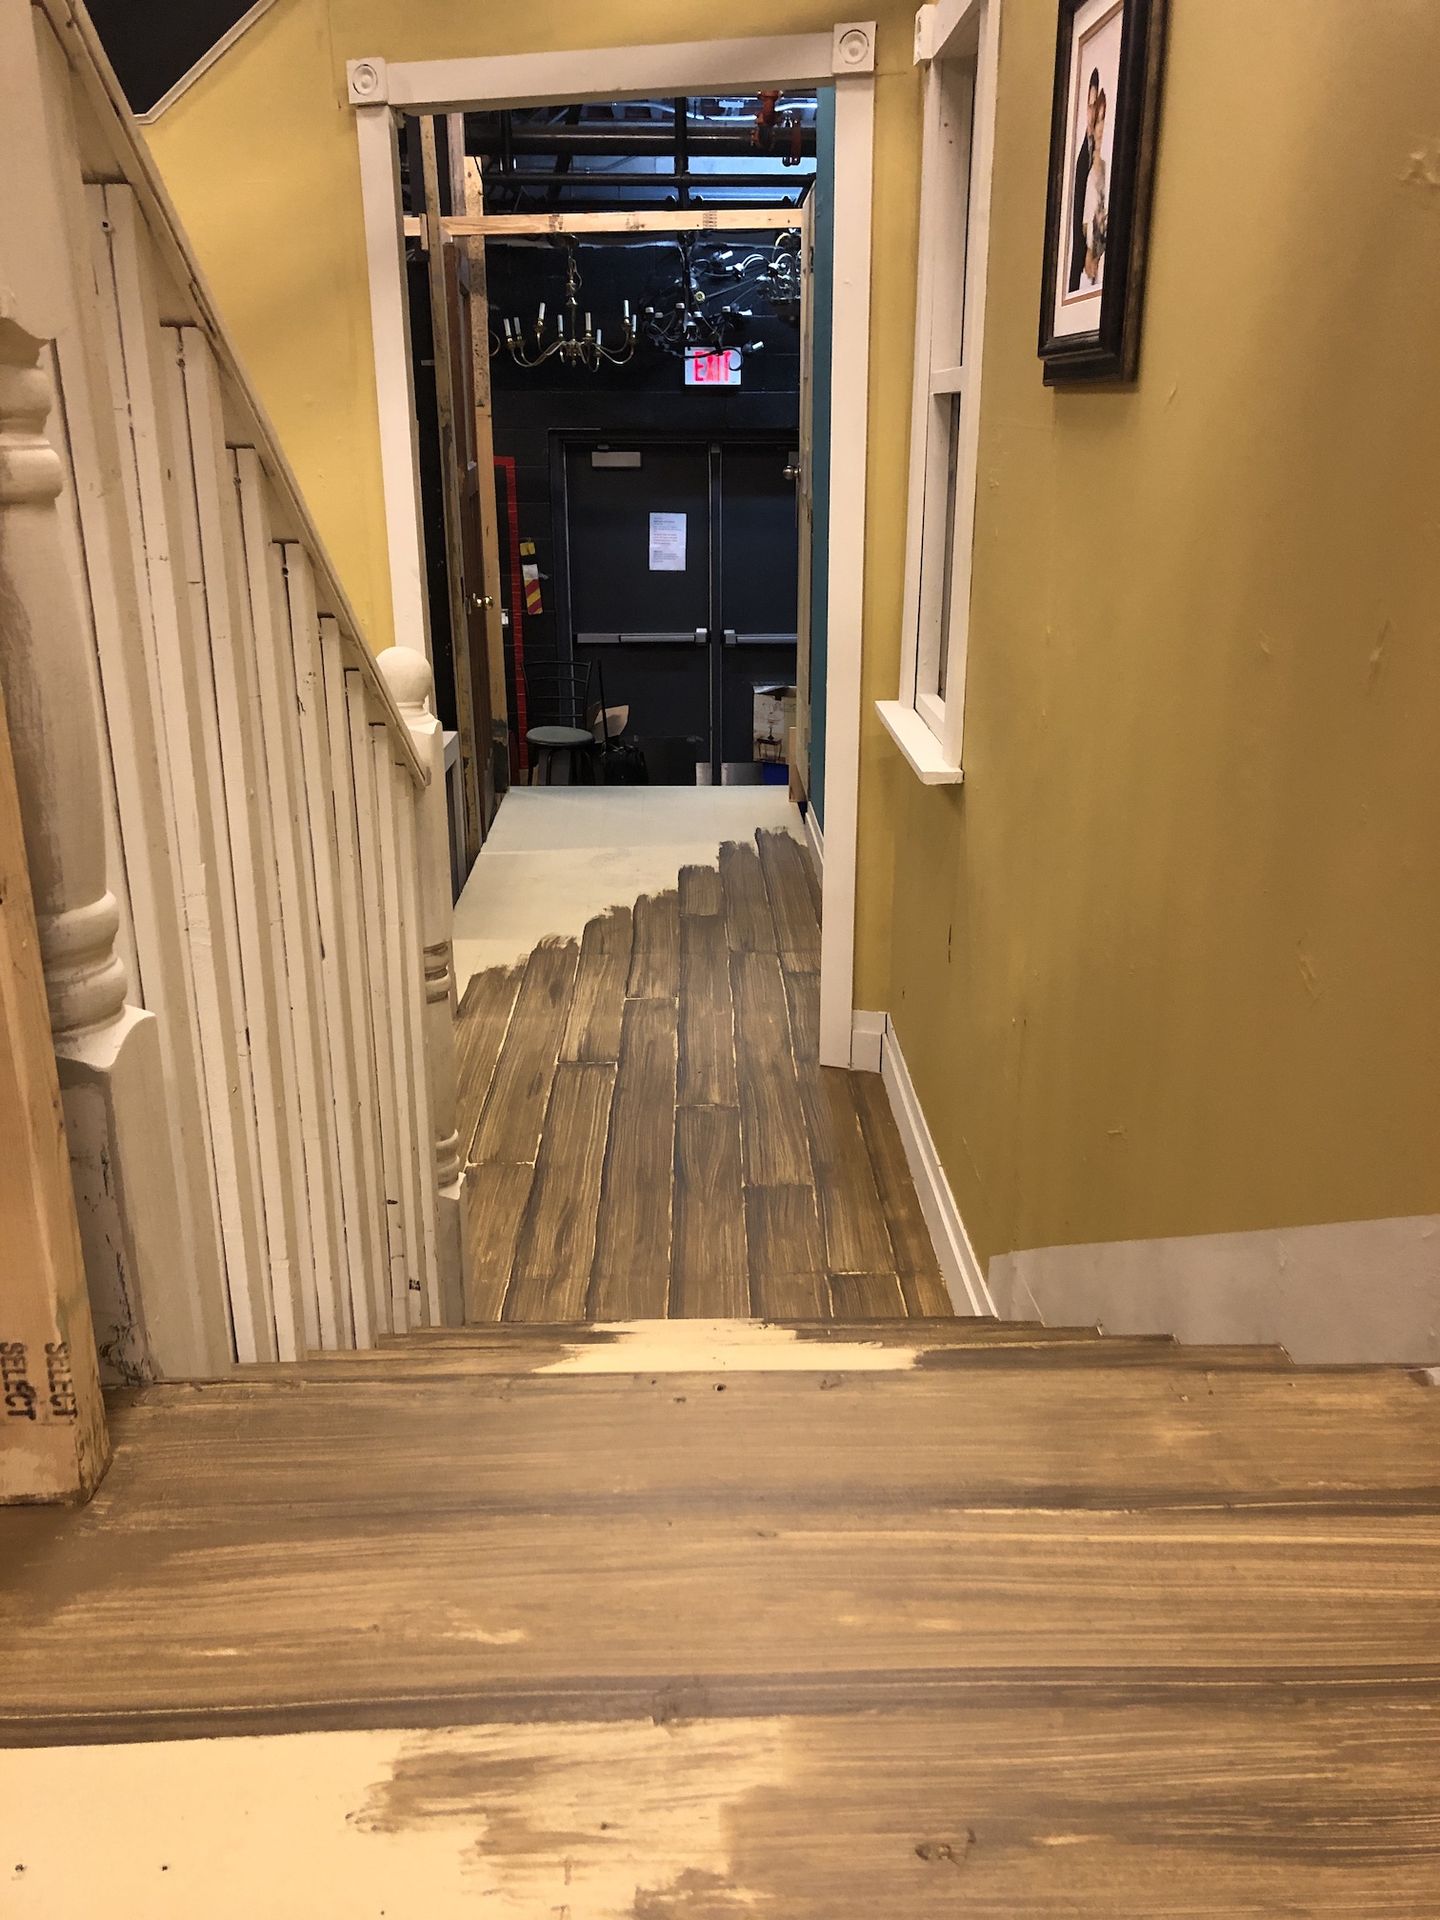
Stairs and foyer given the same paint treatment.
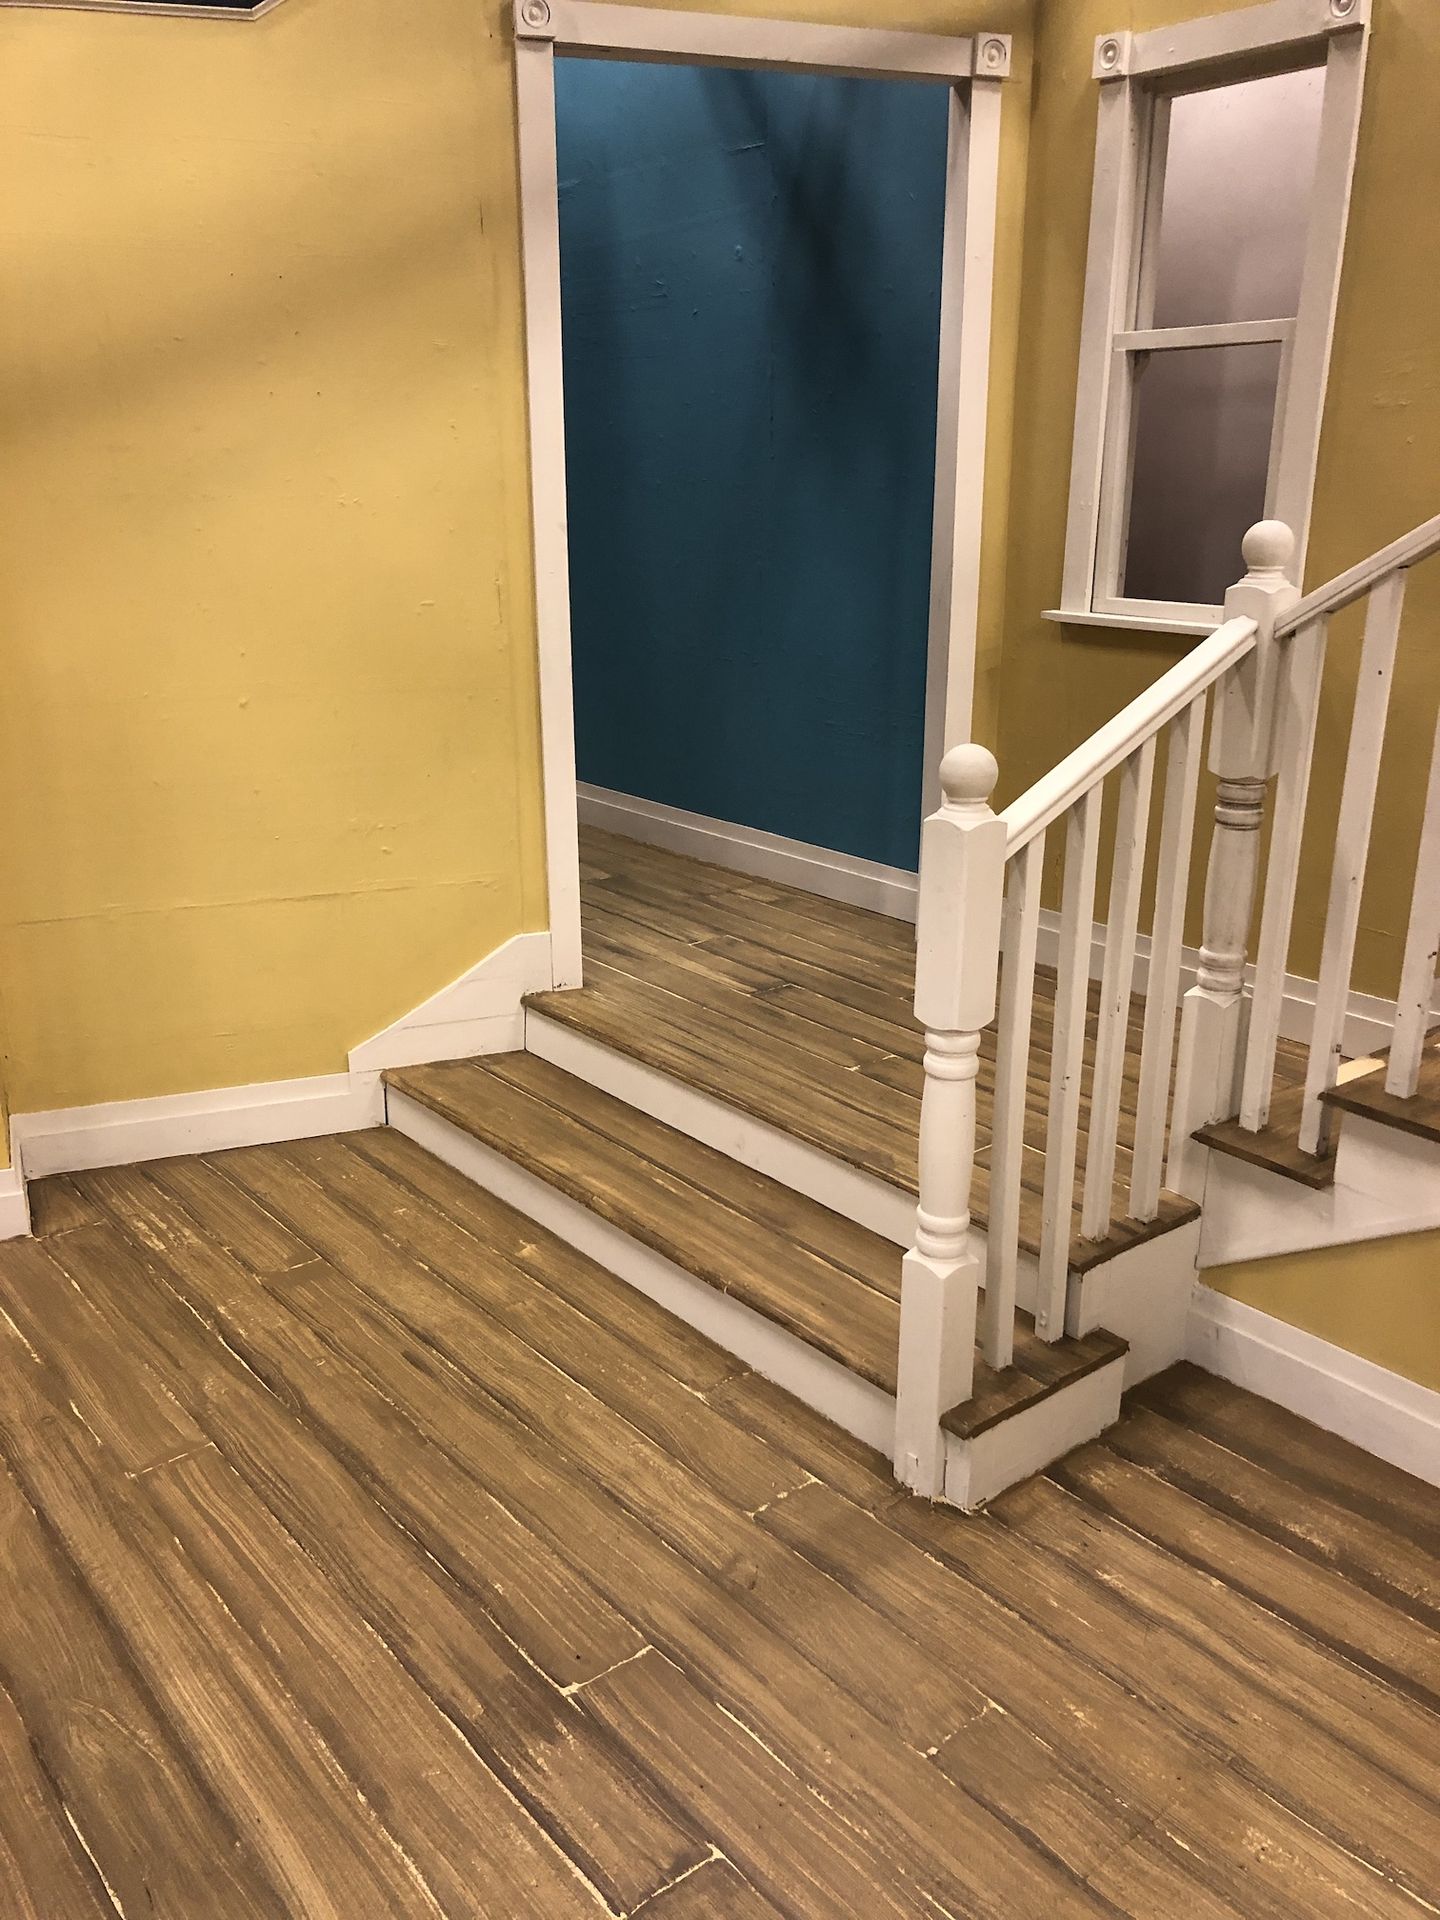
The foyer and stairs were painted just beyond the sight lines. The main stairs would have a carpet runner along the centre portion to deaden the sound of actors and props (suitcases) on the stairs.
After painting, the floor was coated with a clear acrylic glaze for durability. This is a close up of the finished floor.
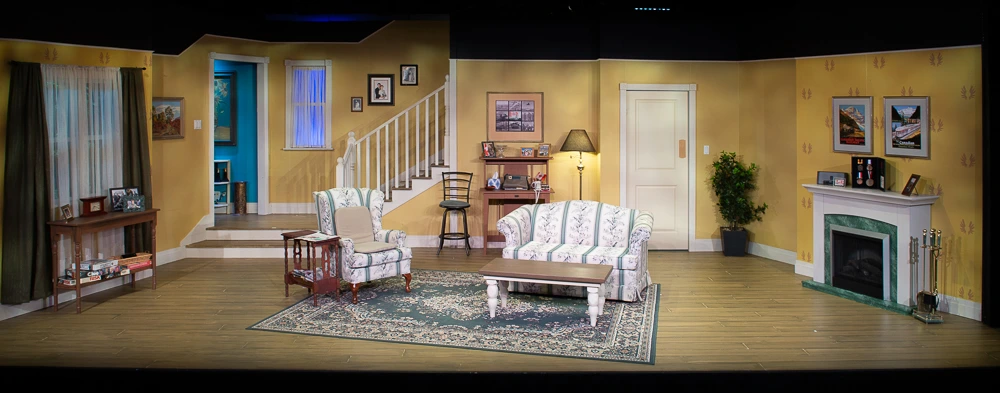
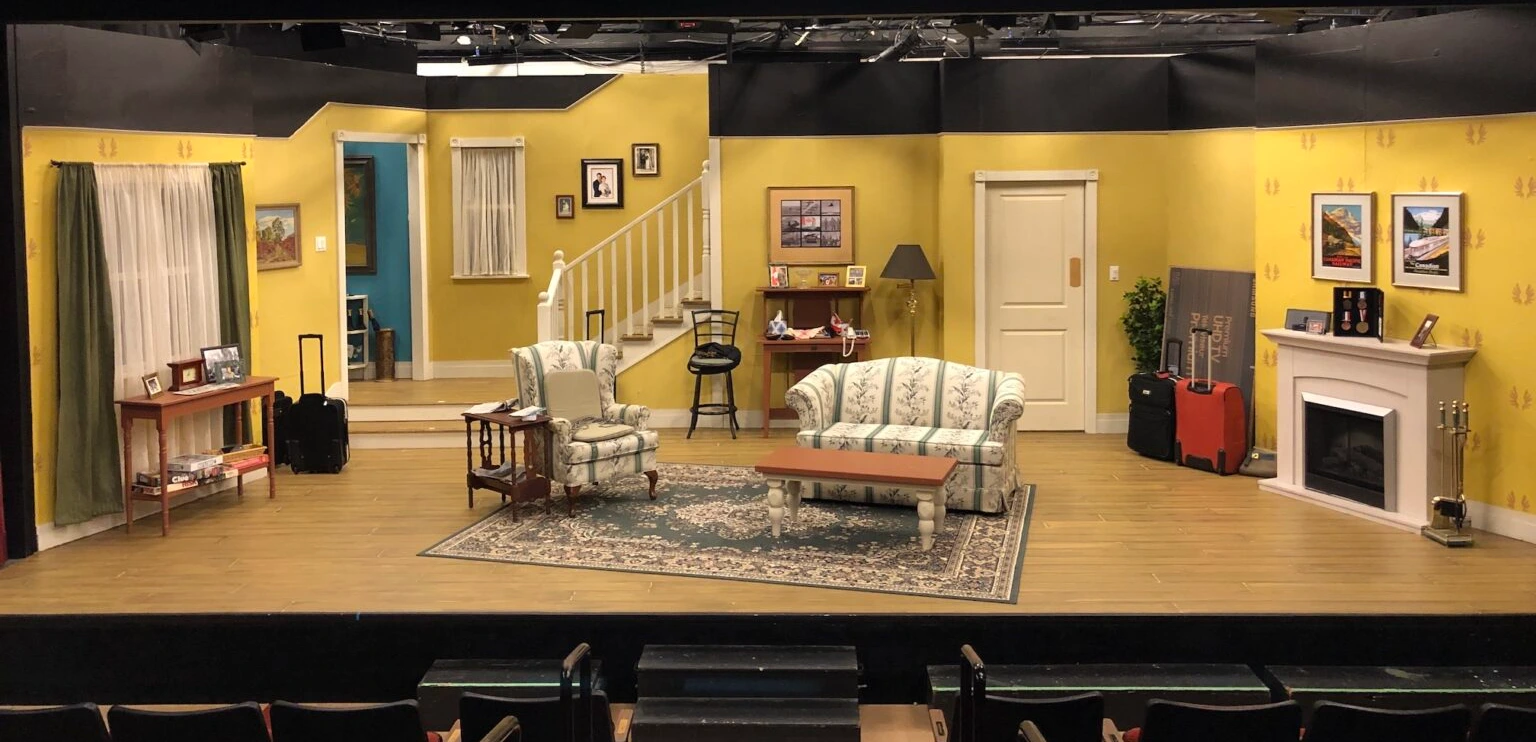
Once painted, the set was dressed with all of the furnishings and decoration required to bring it to life
The painted set before set dressing.
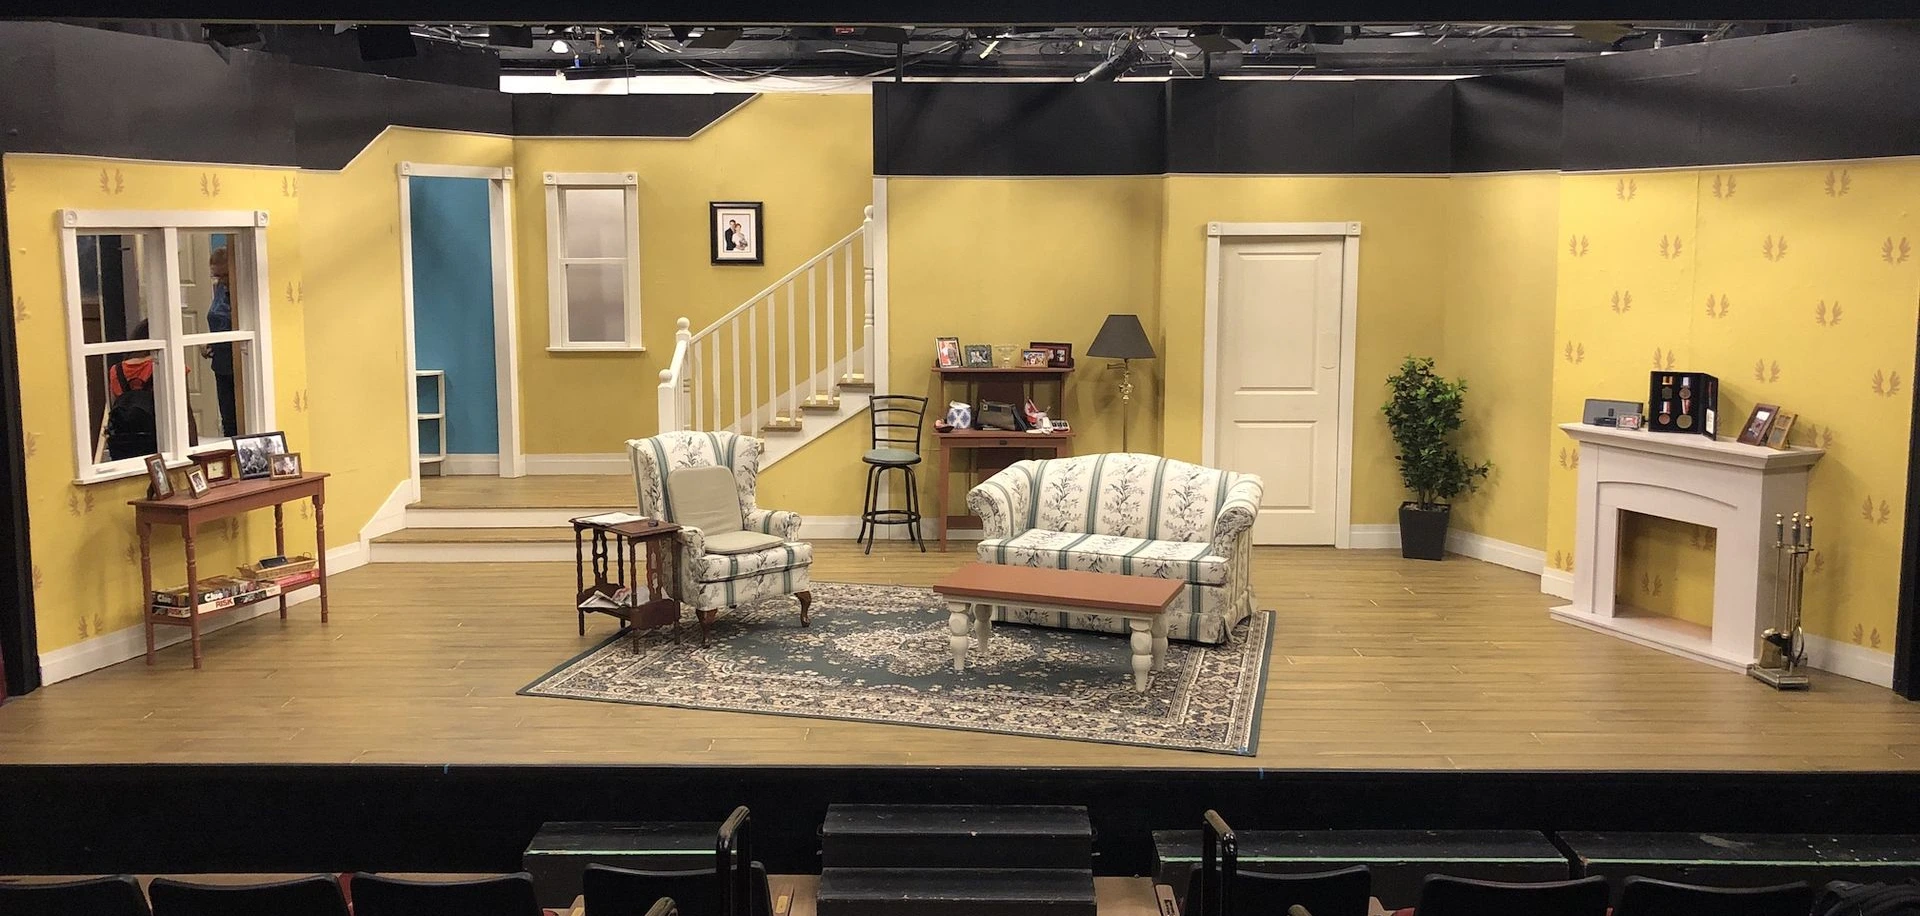
Set dressing has been added (paintings and photographs, drapes, etc.)
The fireplace was an orange wood colour before being spray painted with an off-white spray paint. I then added a green marble paint effect to give it more character, and to match the colour of the fireplace tools.
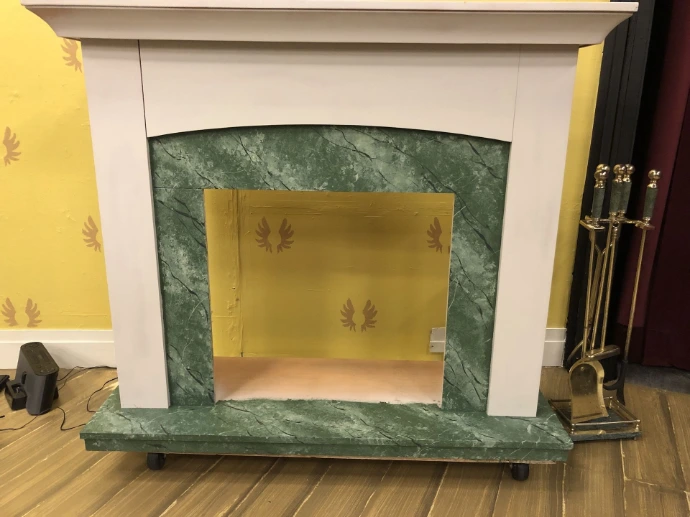
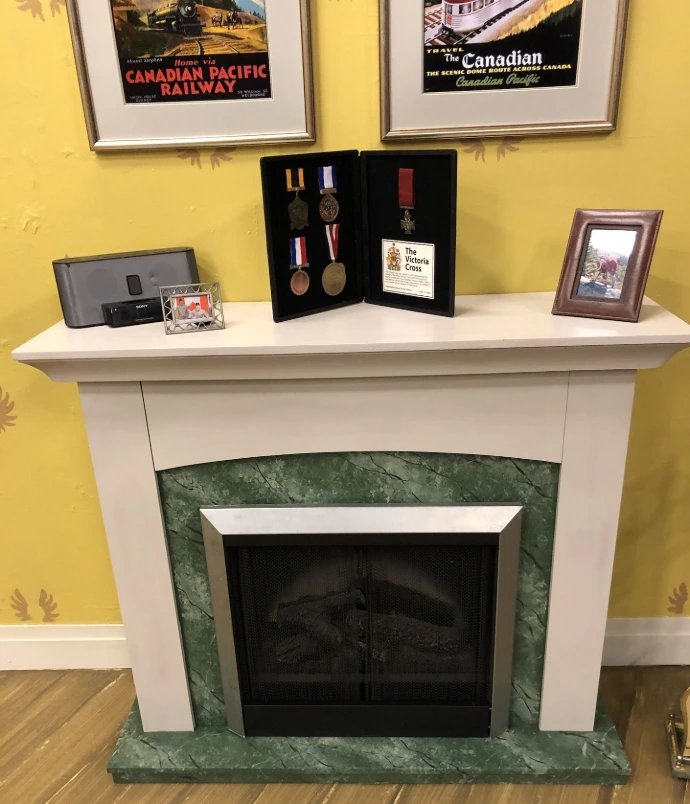
Painted fireplace, with the insert installed and set dressing on the mantel.
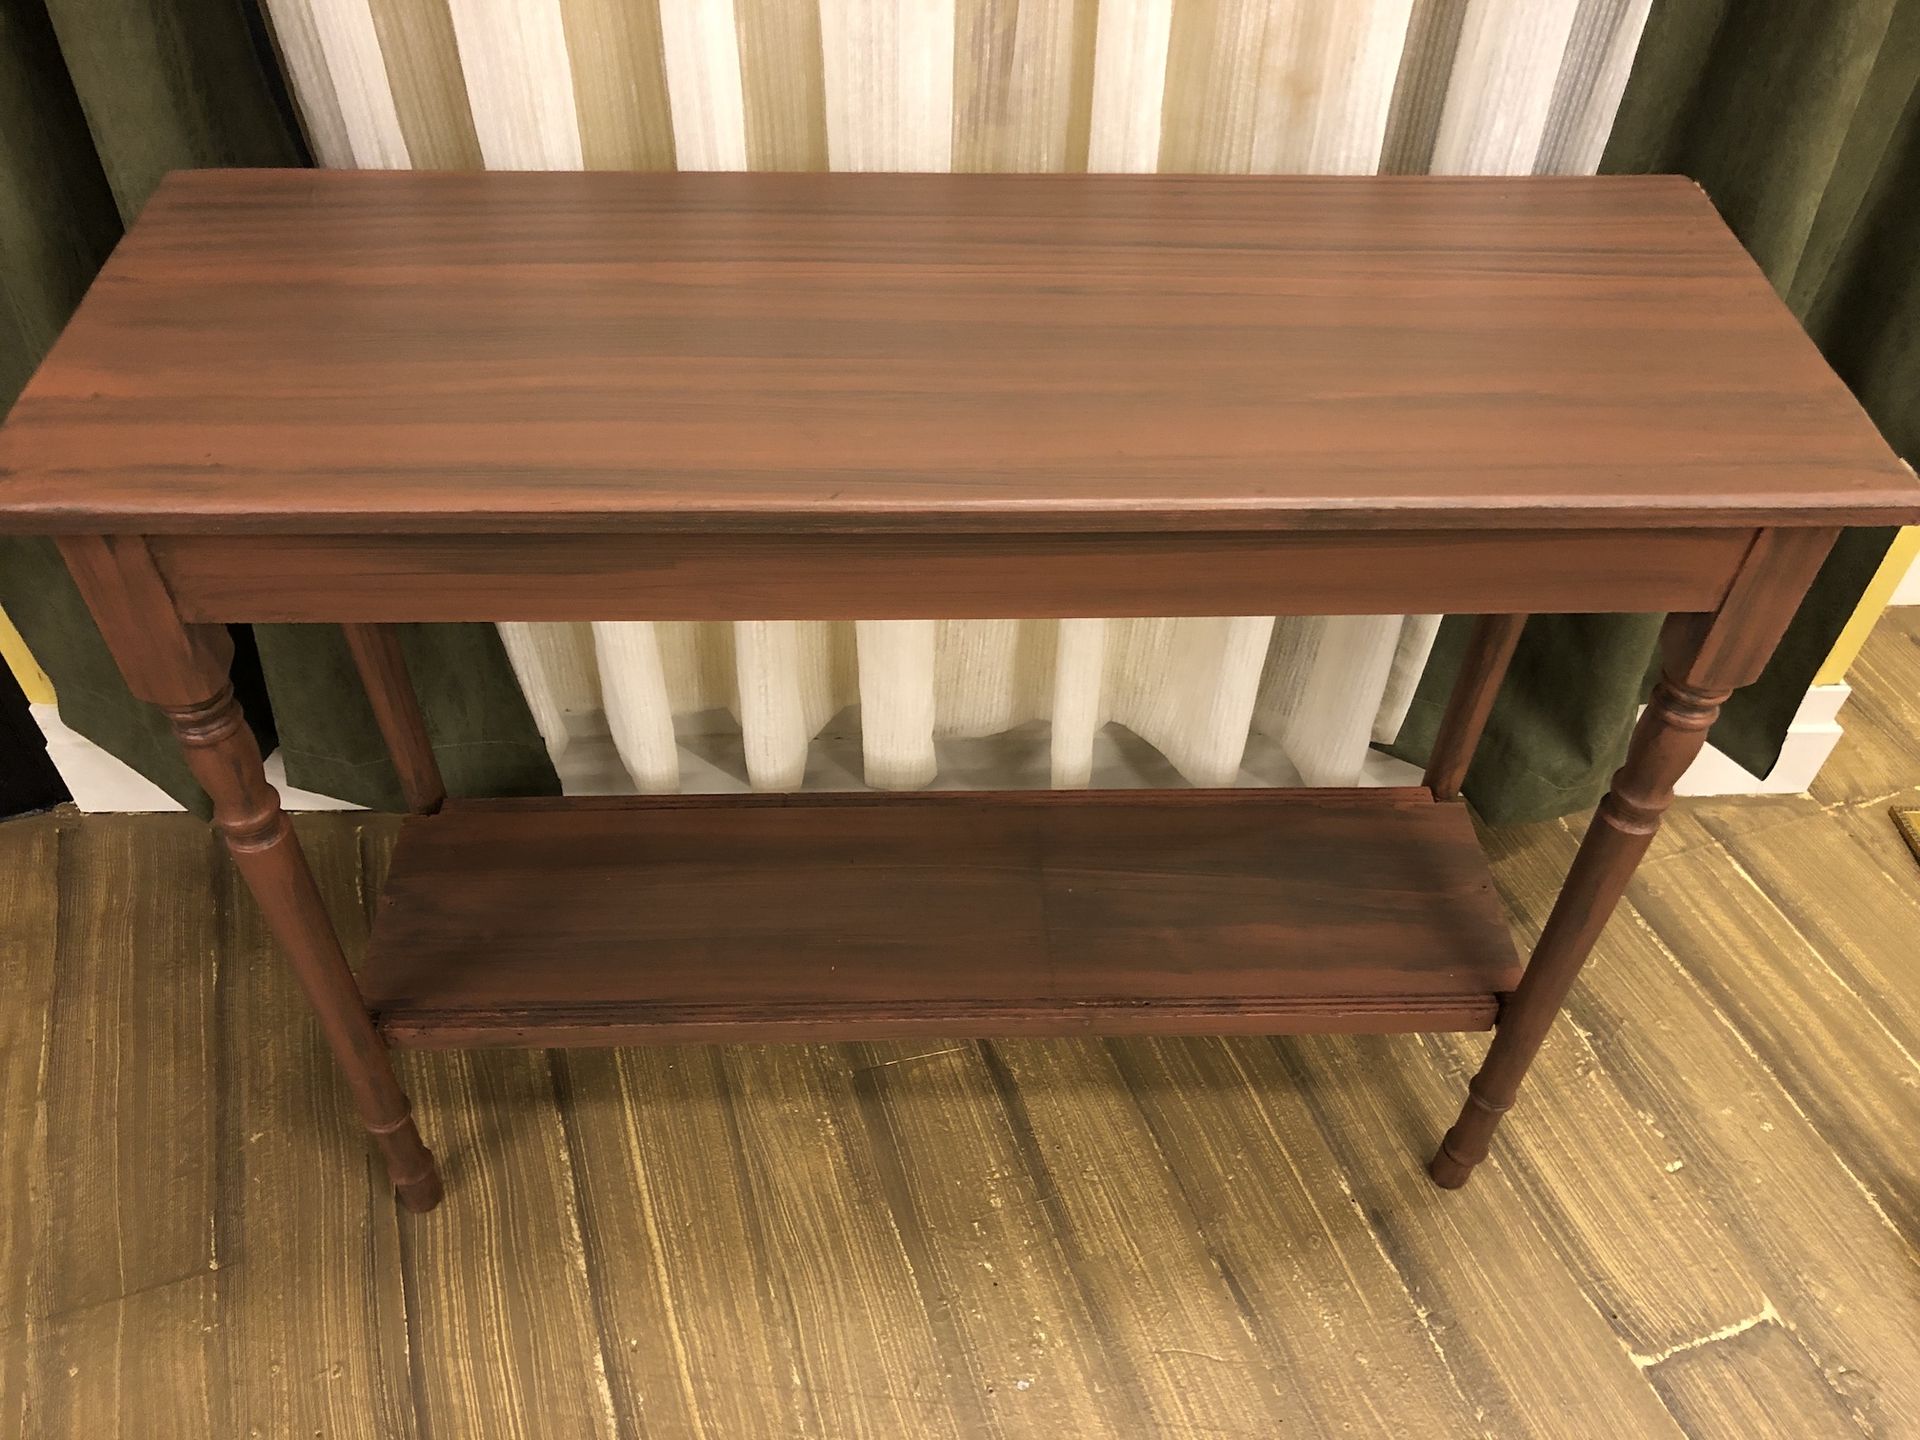
Some of the furniture pieces were loaned by Markham Little Theatre, though we were allowed to paint them so they all matched.
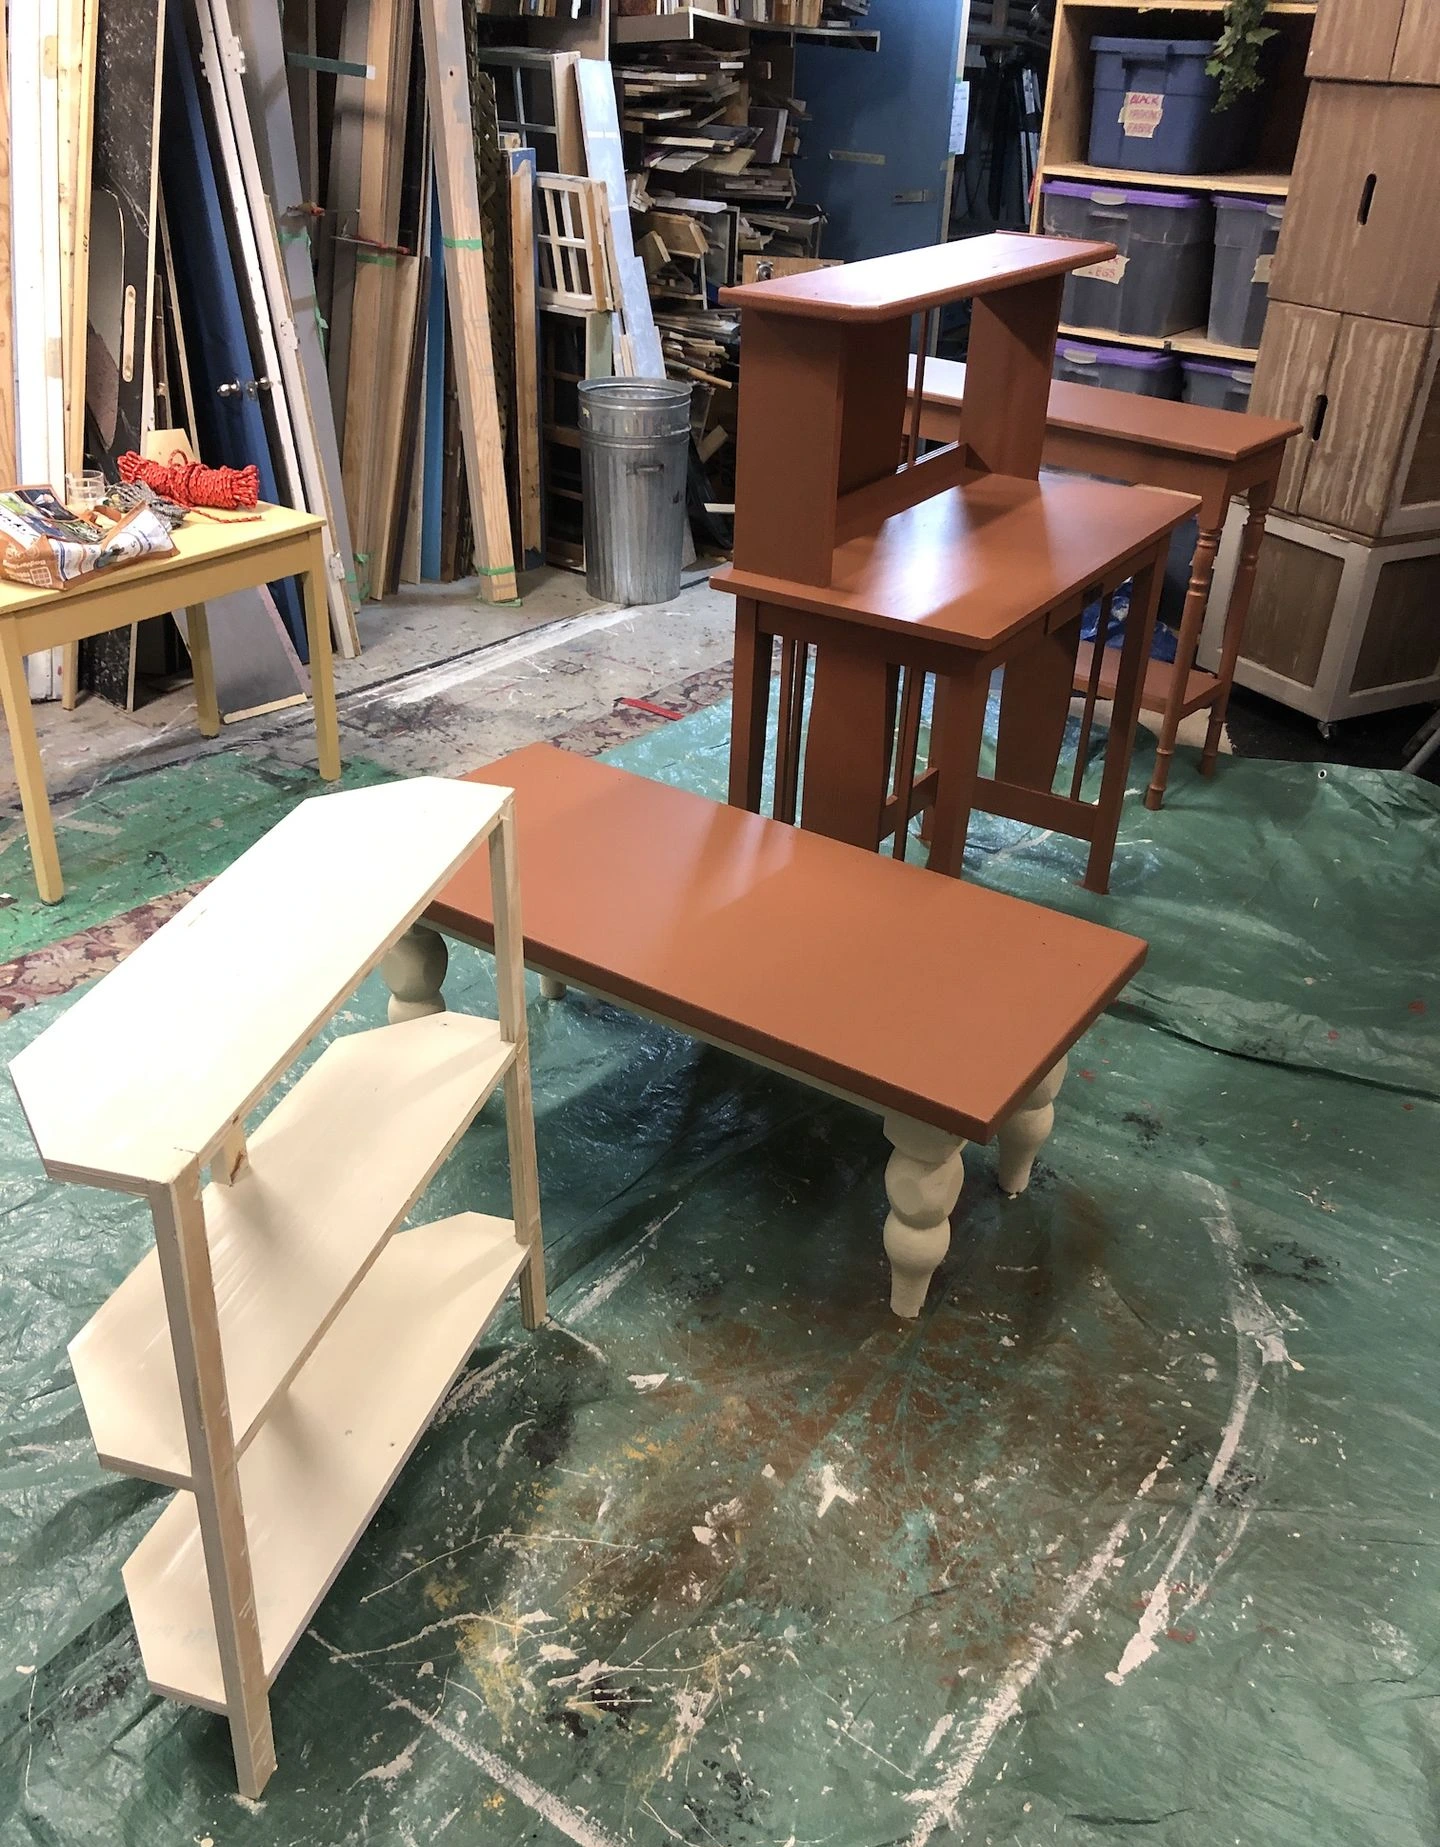
Wood grain was painted on the side table with a dark wash of paint applied with a brush and then partly removed with a rag.
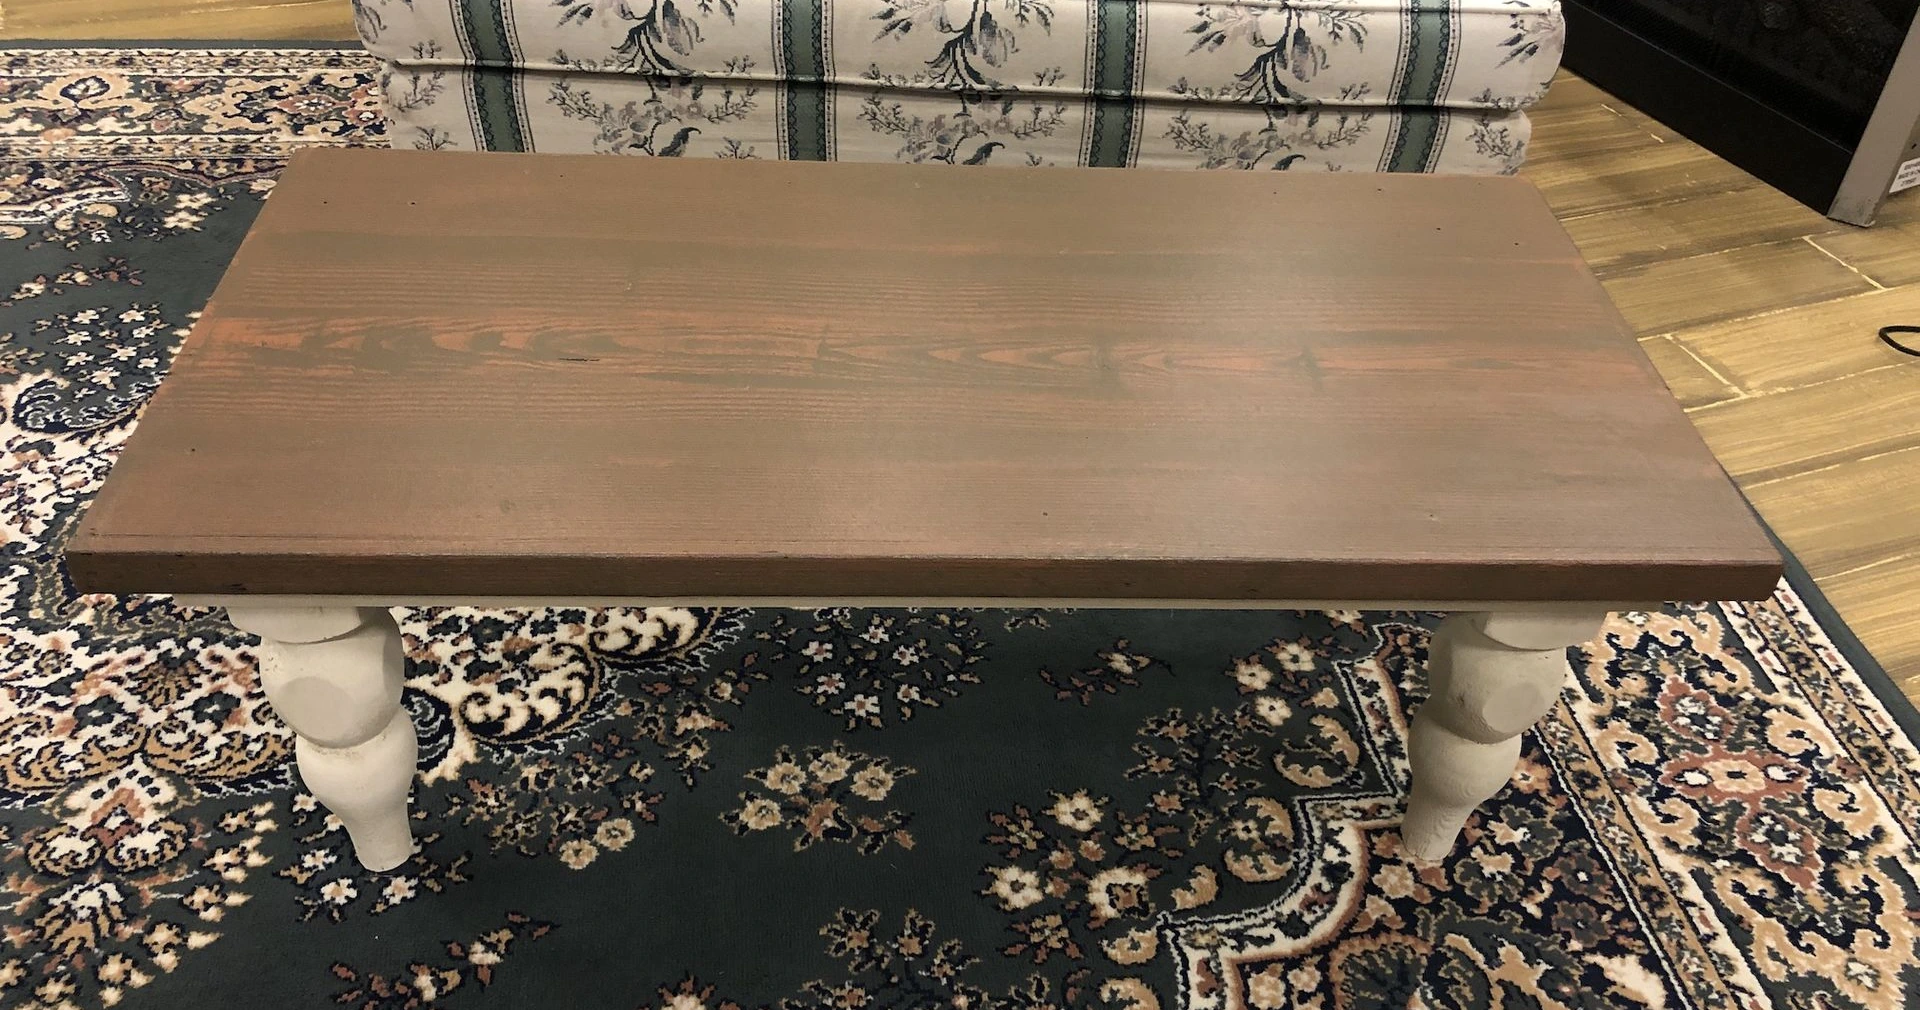
The coffee table was wood grained with a rocker-grainer tool and then glazed with the same product as the floor for durability. It was screwed to the floor for safety (one of the actors would dance on the table during the show).
Dress run of the show on Tech Day
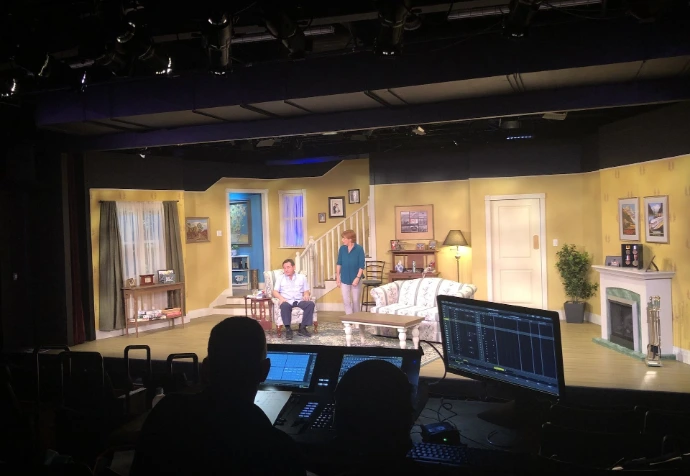
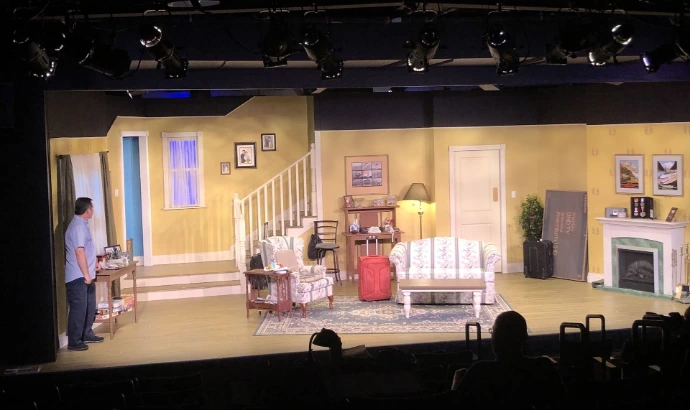
Photograph by Rhonda Starr
The completed set ready for show time.